Managing Zoom Meetings
Suggested process to manage meetings

There are a number of aspects to a session that can be easily managed from within Zoom. You can use a combination of Chat, Reactions, and Audio and Video to increase engagement in your sessions.
This resource will look at managing the following features of a Zoom meeting:
- Chat
- Reactions
- Audio and Video settings
Chat
Chat
To view the Chat panel, click on the Chat icon in the bottom-middle of the Zoom screen.

The Chat panel can be merged with the Meeting Window or can pop-out and float freely (you can drag it to place it anywhere you like on the screen). If the panel is already floating, click on more options menu (1) and then click the Merge to Meeting Window option (2).
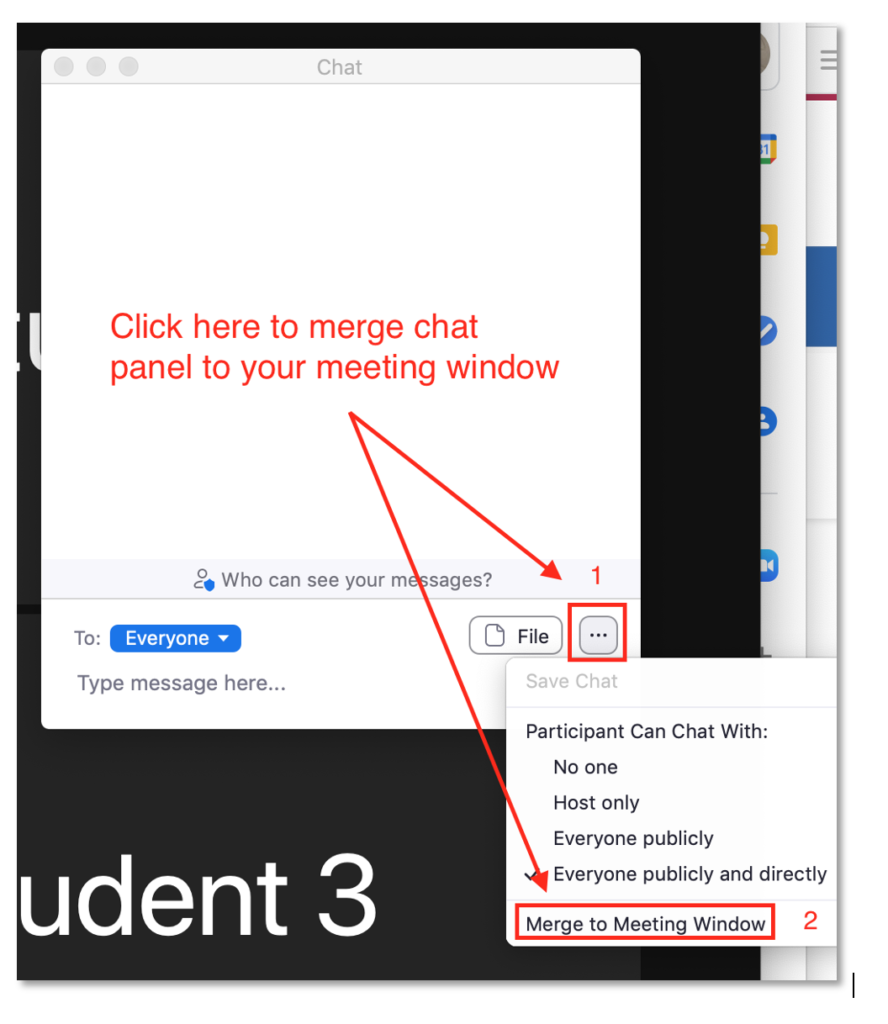
From this menu you can also set the scope for student chat. You can select whether students can chat with:
- No one
- Host only
- Everyone publicly
- Everyone publicly and directly

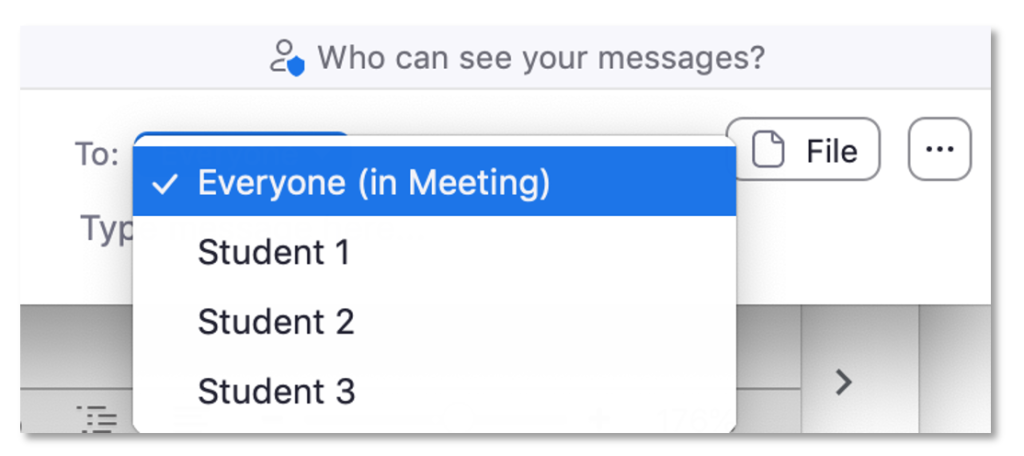
If permitted, users can select who they wish to send a chat message to: i.e. Everyone, the host, or another named user.
Files can be shared via Chat, click on the File button, then select the service from which to share a file.
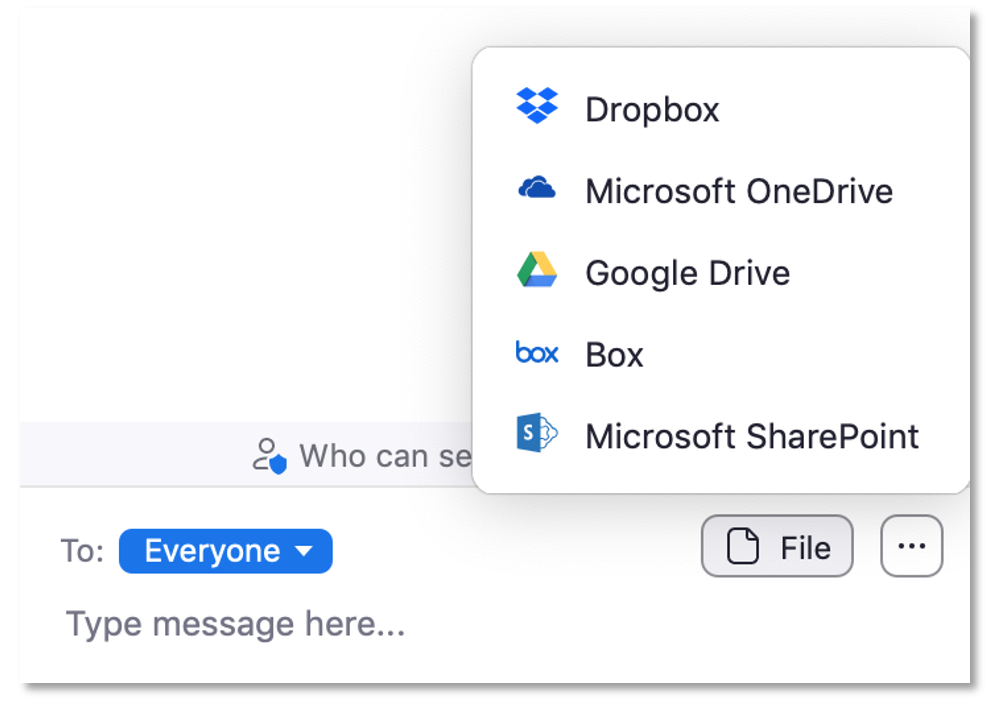
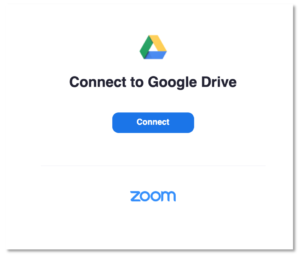
Click on Google Drive to share a file from your UCD Connect Google Drive account. You will be temporarily redirected to a webpage where you can click Connect to agree to allow Zoom to connect to your Google Drive account.
Select the Sign in with Google option to use your UCD Connect single sign on (SSO) to complete the set up securely.
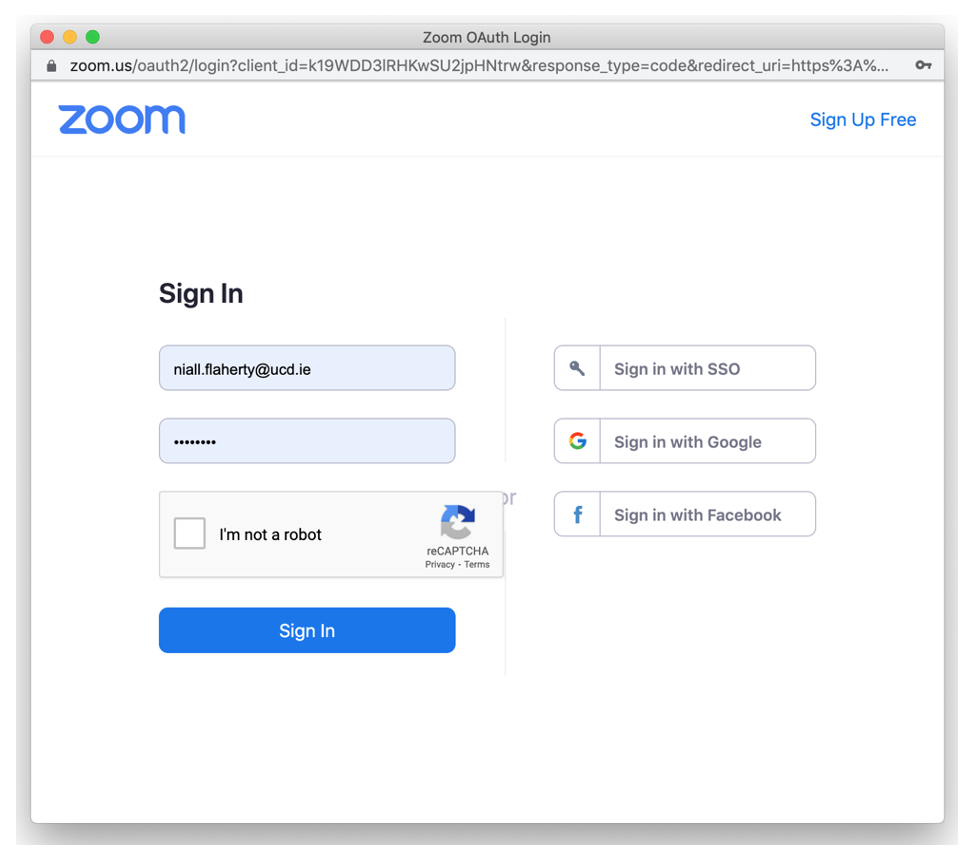
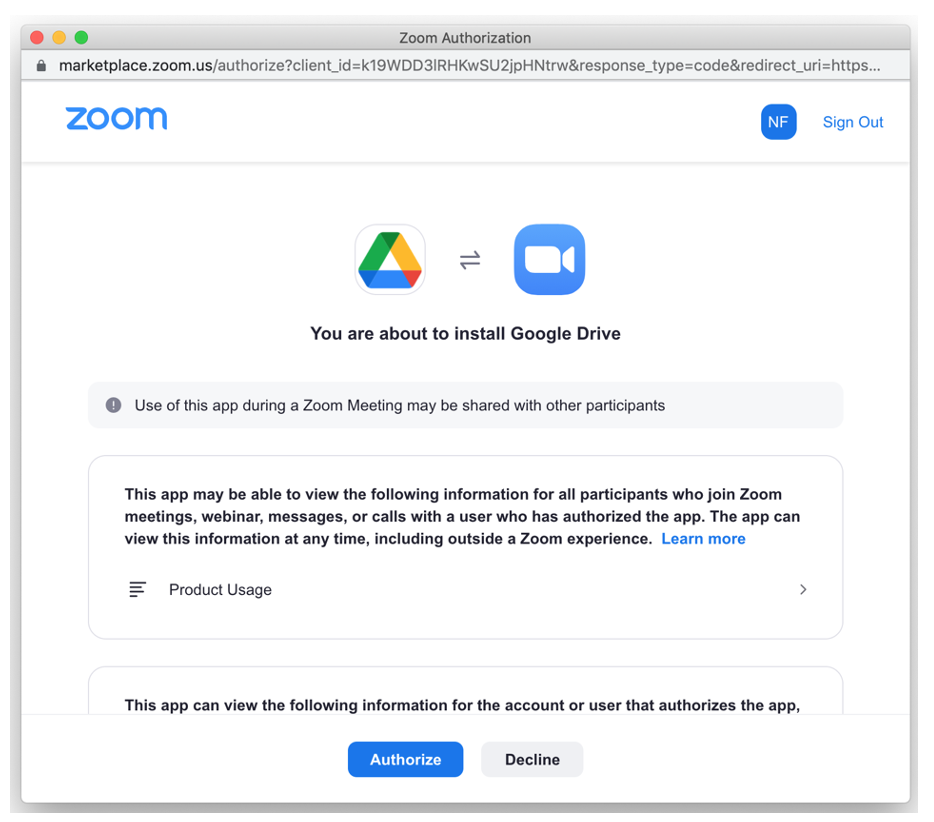
Then click Authorize.
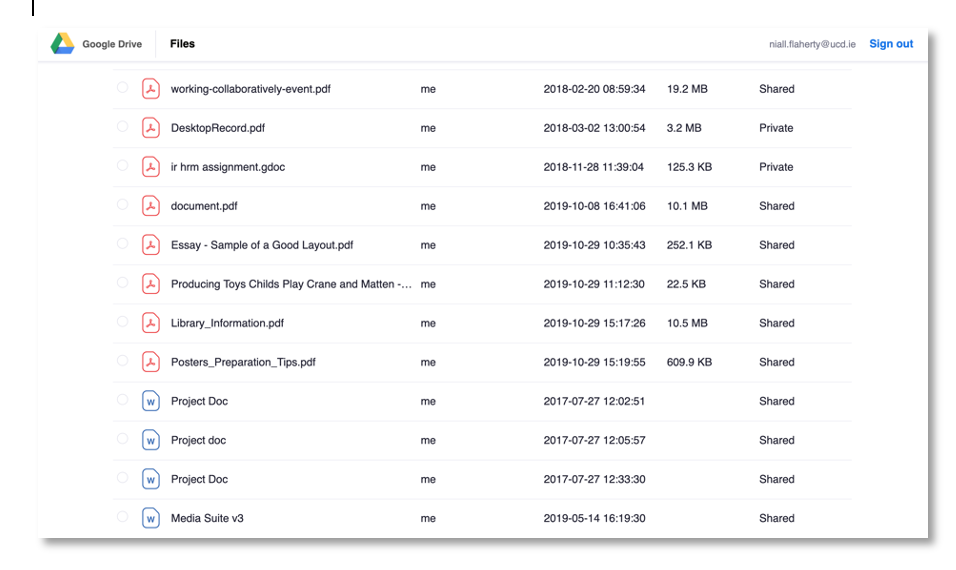
And select the file you want to share via Chat.
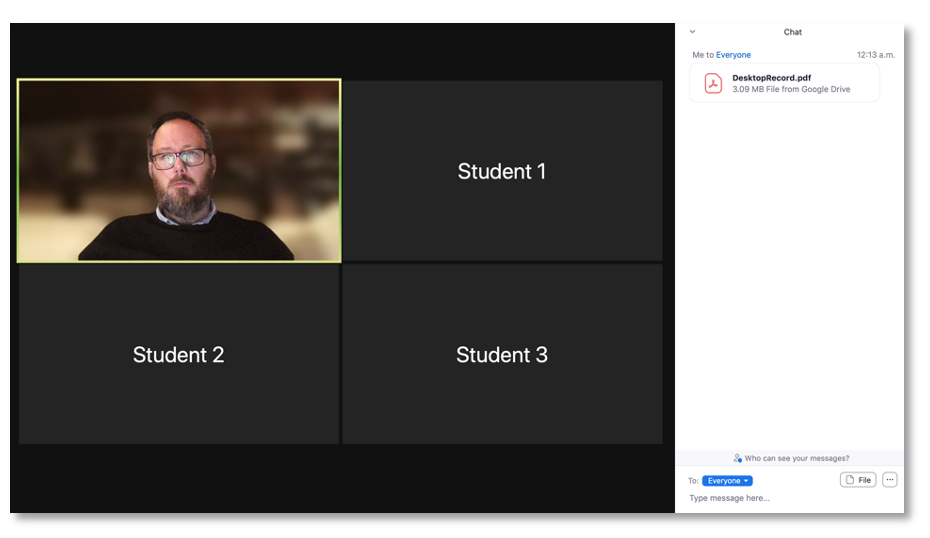
 The file then appears in the Chat panel as a downloadable link.
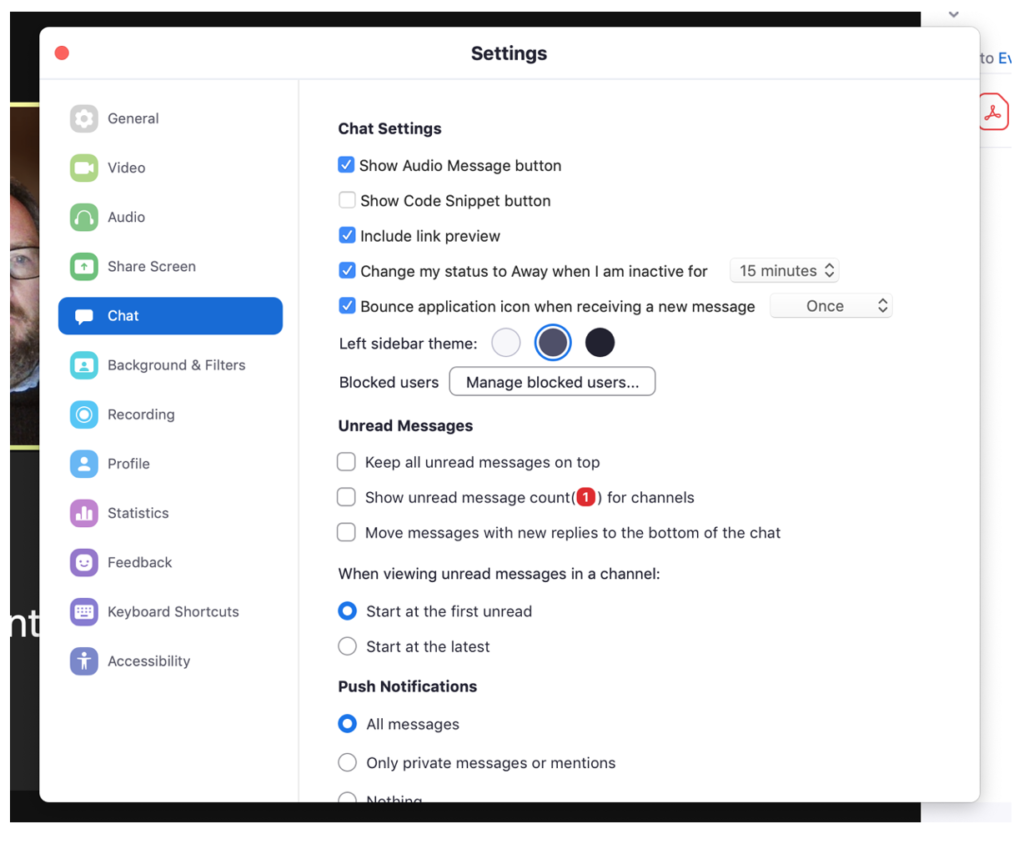
To access additional setting for Chat, click on the Video Settings option on the bottom-left of the Zoom screen.
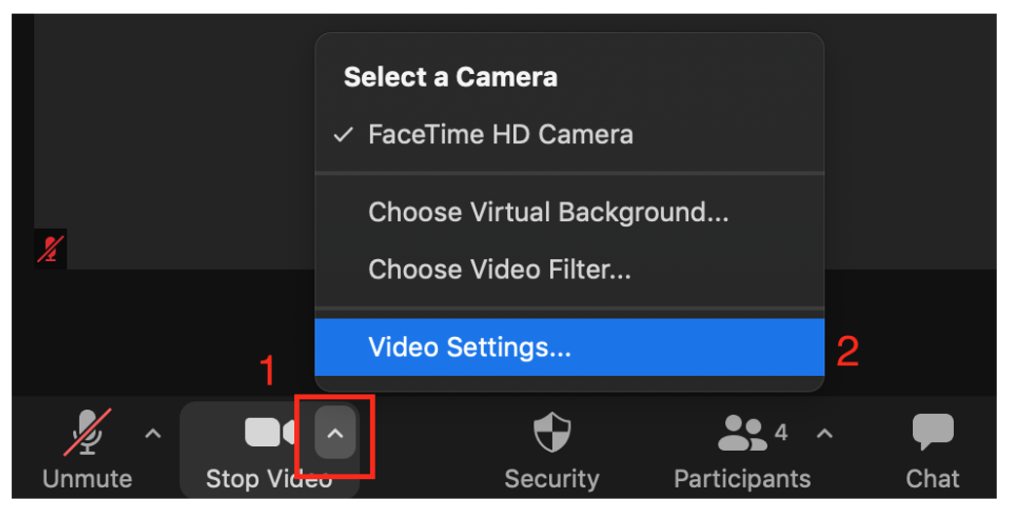
Click on the Chat settings half way down the left-hand side to reveal the additional options.
Reactions
Reactions
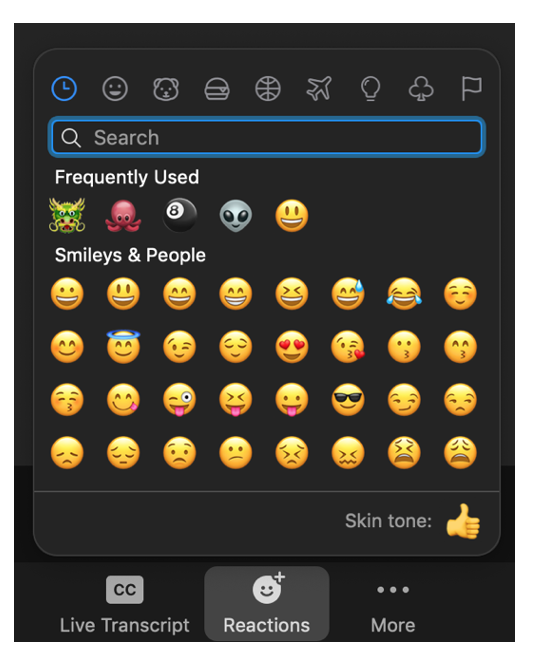
Emojis and icons can be used to quickly communicate while in a Zoom session. The Reactions icon is available in the bottom-right of the Zoom window. Click on Reactions to access the emojis you can use to communicate quickly.

The initial list of emojis includes a number of icons which are most typically useful within virtual classrooms presentations.
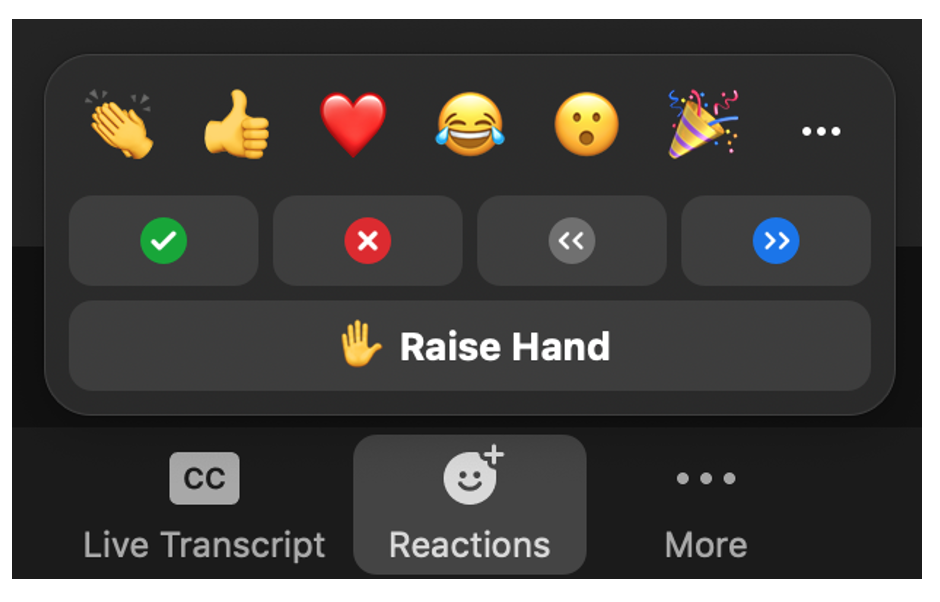
Perhaps the most useful is the Raised Hand icon. Students should be encouraged to use this icon to alert the instructor that they wish to contribute directly, either by asking a question via Chat, or more likely by asking a question directly, using a microphone or camera. The instructor could choose to take the question, or ignore until later.
The icon will display on the top-right of the student’s profile tile.
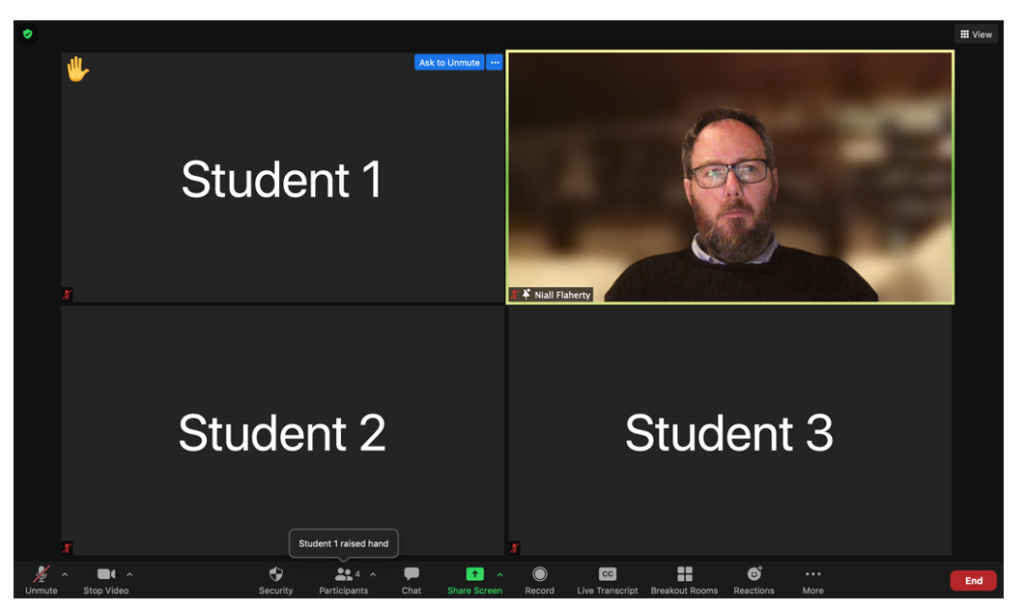
It will also appear beside the student’s name in the Participants panel, if that panel is in use.
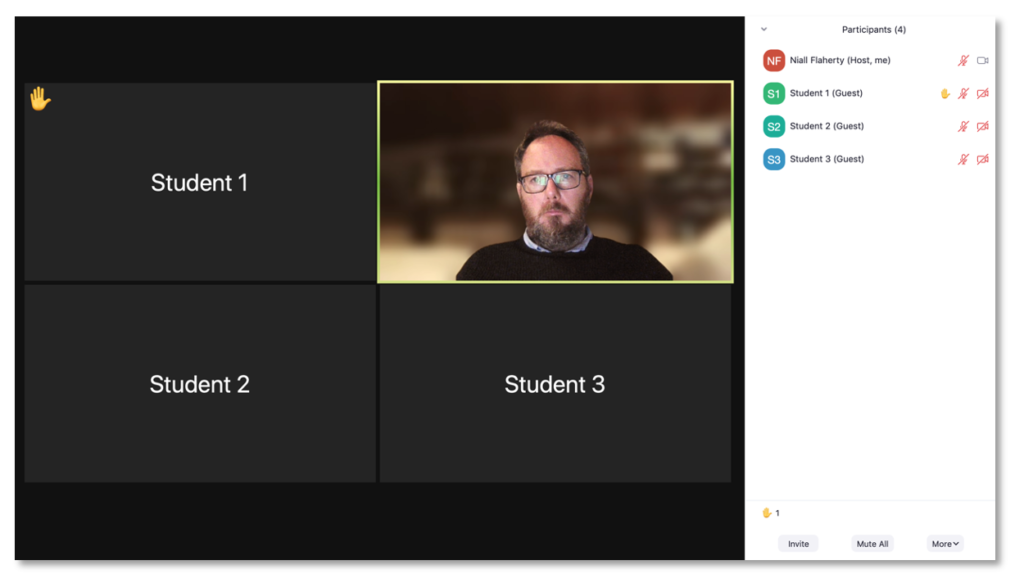
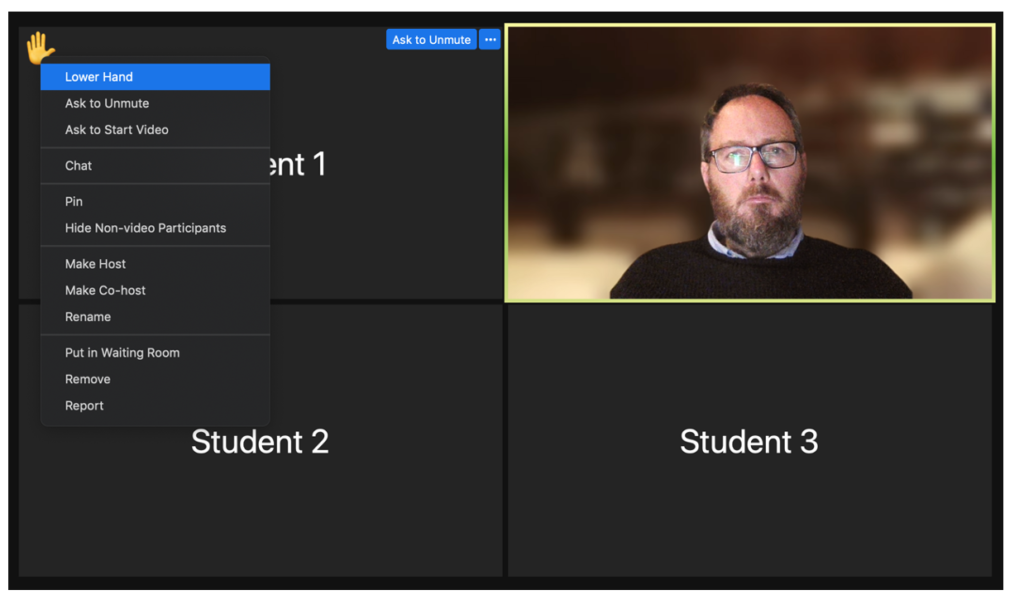
By clicking on the student’s Raised Hand icon the instructor can select from a number of common responses, including Lower Hand, Chat directly with the student, or invite the student to unmute their mic to ask a question out loud.
Additional icons allow other quick communication options. Including Clap, thumbs up, heart, etc for showing approval or support to a presenter or speaker. These icons don’t stay on screen permanently and will disappear after a short period of time.
Quick polls can be run where the instructor asks students for their agreement with a statement, student can select the Yes or No icons. There are also icons to ask the instructor to speed up or slow down.
Quick poll icons do remain on screen for the instructor to see in a number of locations, until cleared. They can be seen on the top-left of the student tile, on the participants menu beside the student’s name, and also summarised at the bottom of the Participants panel.
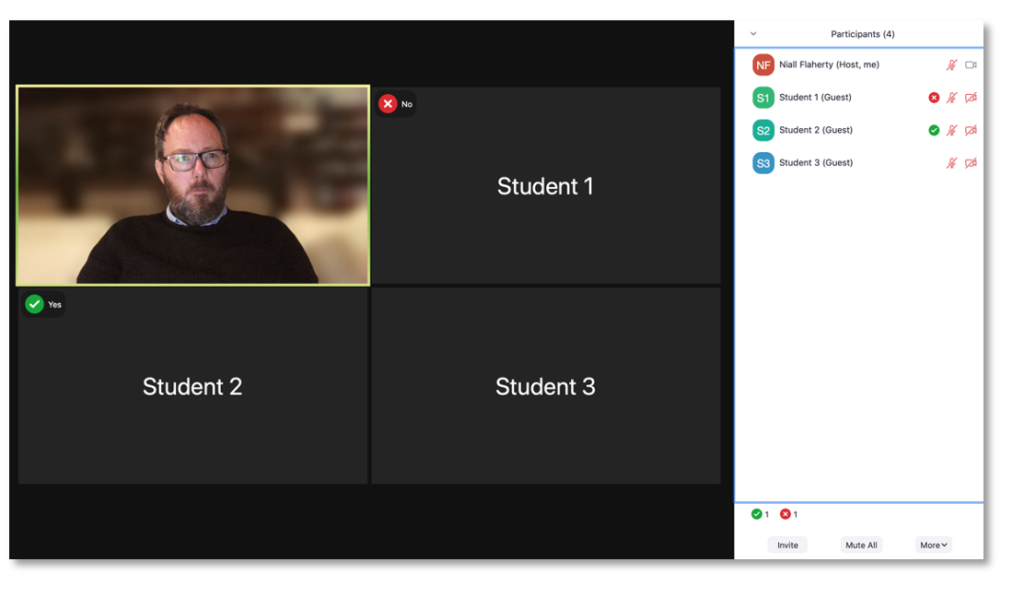
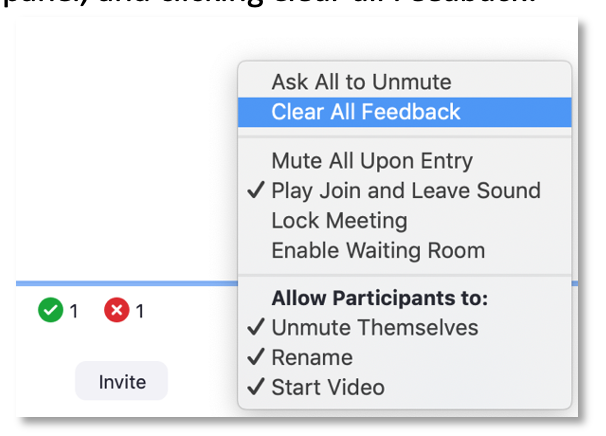
Polls can be cleared by clicking on the More menu, on the bottom-right of the Participants panel, and clicking Clear all Feedback.
Additional icons are available via the more options menu (3-dots)
Audio / Video settings
Audio / Video settings
If the instructors wish, they can allow students to use their cameras and mics to communicate directly in a session. They can also invite students to unmute, and to turn on the their camera, but for privacy reasons instructors cannot switch cameras and mics on for students.
E.g. when a student has a Raised hand icon displayed, an instructor can Ask to Unmute the student. The Ask to Unmute option is available in the top-right of the student’s tile.
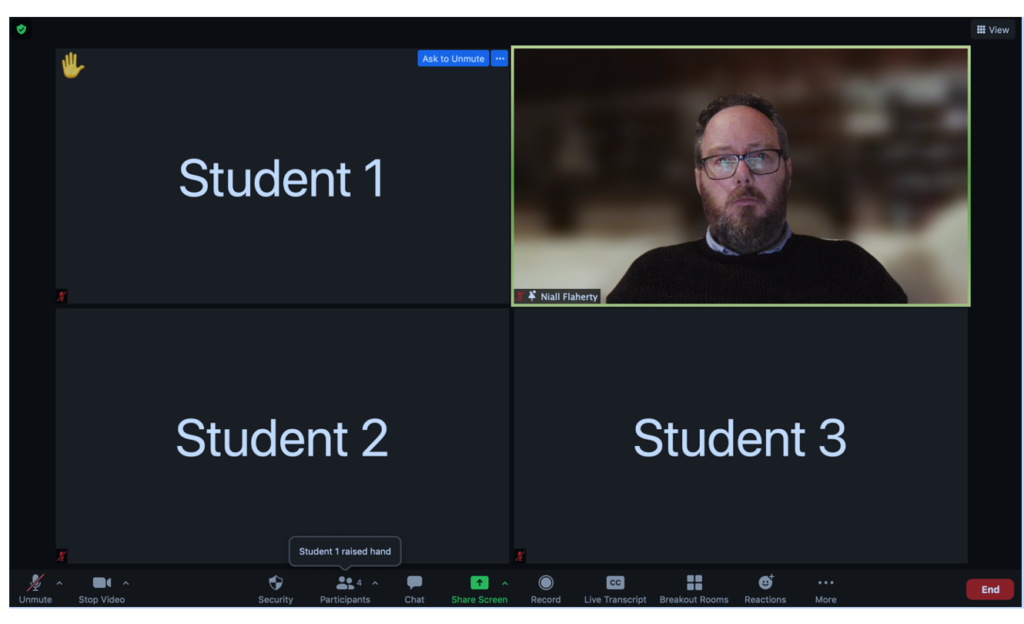
If clicked, the student has the option presented to them onscreen to unmute their mic. Click on the Participants panel to view which students have their camera and mic active currently.
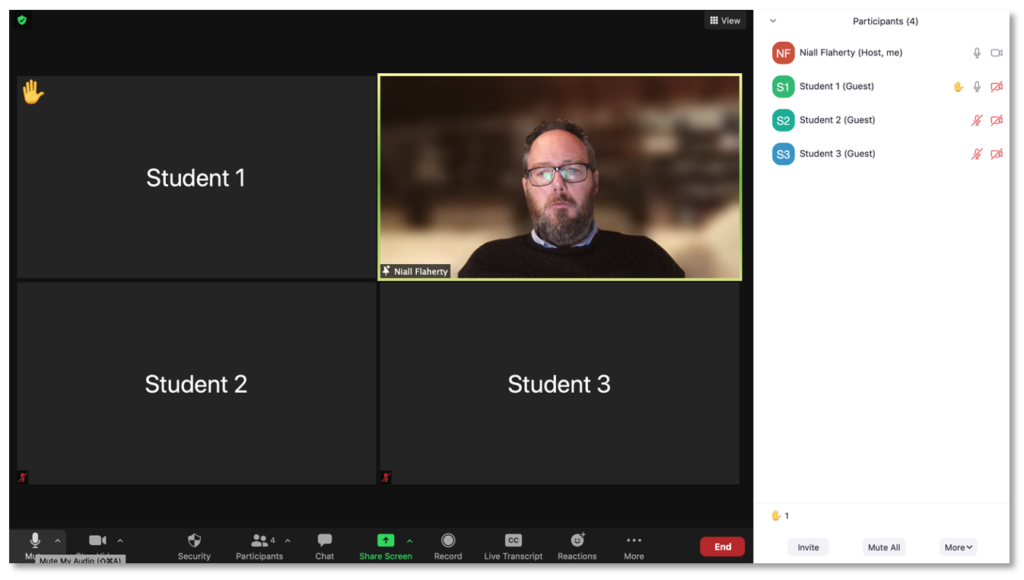
The student with the enabled mic can now speak to the class. When the student has finished speaking the instructor can mute their mic again by clicking on the top-right on the student’s tile, or by clicking on the student’s name in the Participant’s panel, and selecting Mute.
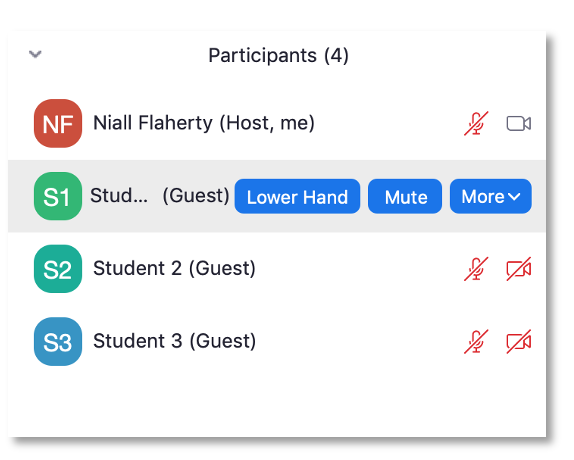
Additionally the instructor can click Mute All on the bottom of the Participants panel to mute all students at once.
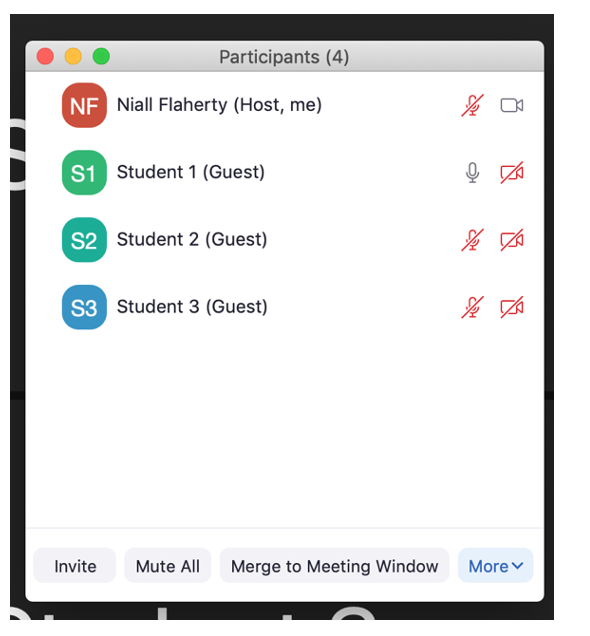
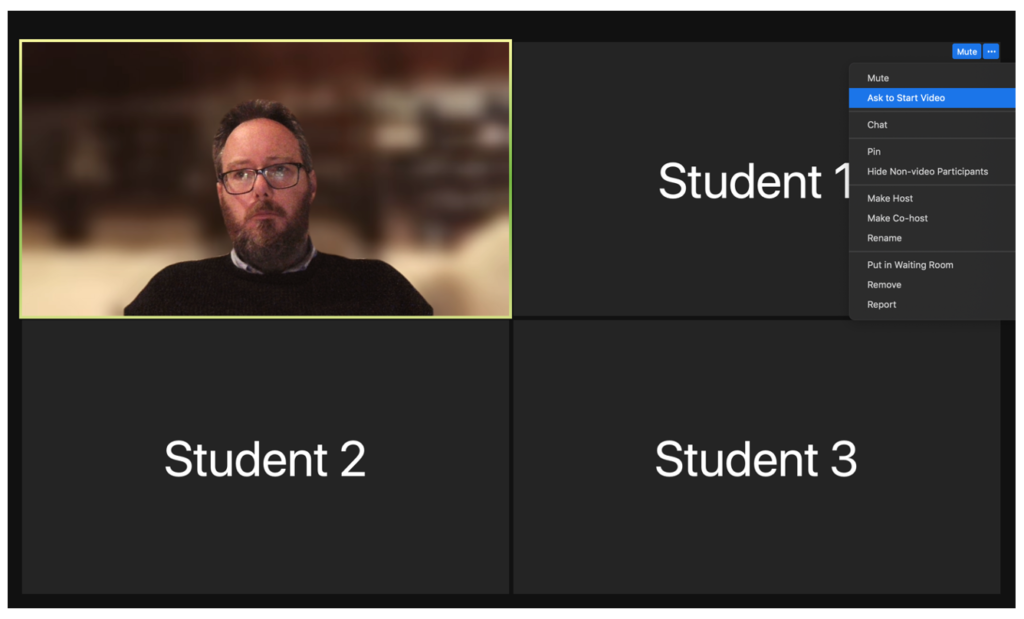
Along with audio, Instructors can ask students to turn on their video in session. Students can then turn on their video cameras if they wish.
Click the top-right of a student’s tile and select Ask to Start Video.
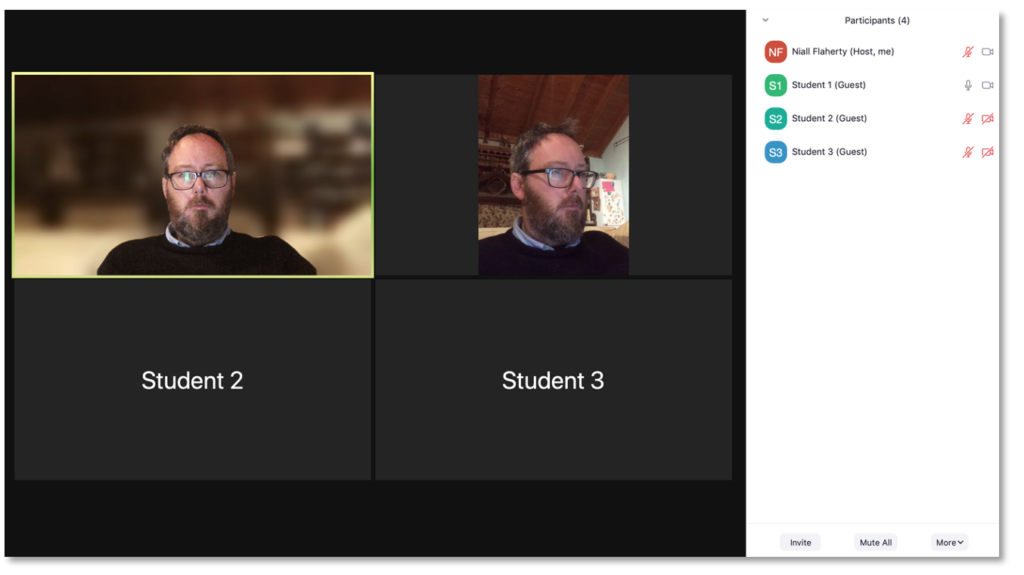
The student will be presented with an option on screen to turn on their video camera, if they accept their camera will appear over their student tile.
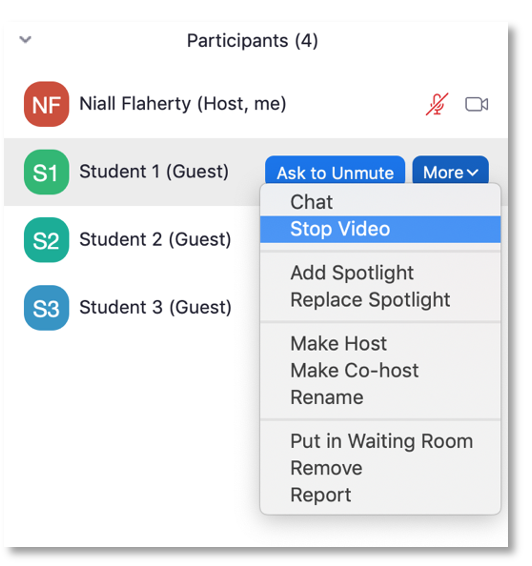
The Instructor can Stop Video for a student by clicking on the menu on the top-right of the student tile…

Or by clicking on the student’s name in the Participant’s panel and selecting More and then Stop Video.
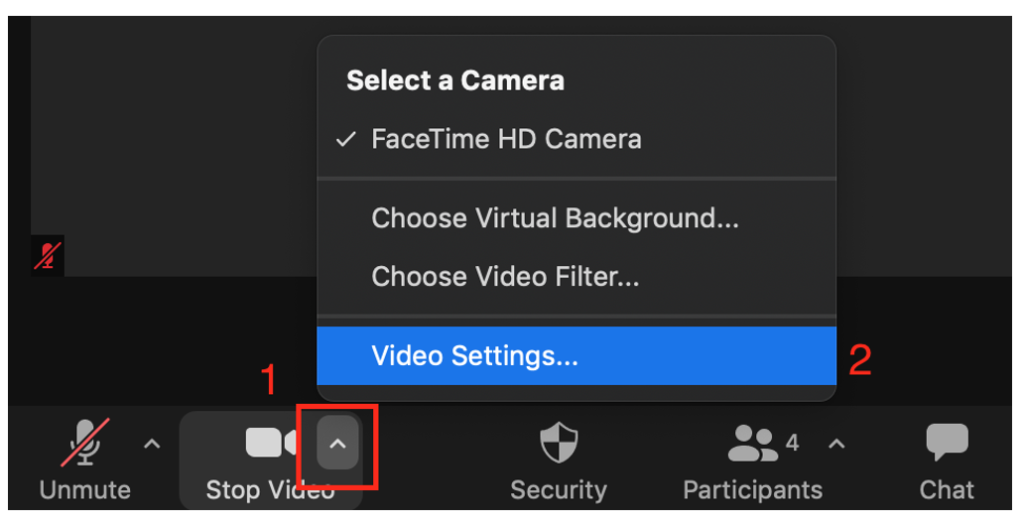
To access additional setting for Audio and Video, click on the Video Settings option on the bottom-left of the Zoom screen.
Engagement
The careful use of chat, reactions and audio and video can be a source of engagement within a virtual class, and elevate classes from one-to-many presentations to far more interactive events. Becoming comfortable with the settings that allow an instructor to permit or refuse access to tools for interaction allows the instructor to feel more confident in their use and know they can ensure the integrity of each session in terms of privacy and security for all participants.


