Adding Zoom recordings to the Media Server
Zoom recordings shared directly from your cloud account have the potential to be forwarded and disseminated outside of your module enrolment. The recording is therefore only private to the extent that the URL is not disclosed.
To mimimise the risk, please review the Share settings in your Zoom account. Consider adding an expiry date to the link, preventing viewers from downloading the video and adding passcode protection.
Currently video recordings stored in the Zoom cloud will be automatically deleted after 400 days. We strongly recommend removing recordings in your Zoom cloud account and uploading them to your personal channel in the College of Business’s media server.
If you don’t have an account on the COB media server, please contact the Business eLearning team (business.elearning@ucd.ie) to request one.
For information on accessing your UCD Zoom account, as well as a review of UCD account settings, please review IT Services information page. UCD IT Services Zoom resources

Steps to removing Zoom recordings from cloud accounts and adding to the COB media server
Follow the steps below to learn how to find your recordings, add them to the media server and then delete them from your cloud account, or view the guide.
Steps
Step 1: Log into your Zoom account to access any recordings you have made. If you log in via the Zoom desktop client, you will find the list of recordings by going to ‘Meetings’ And then ‘Recorded’
Step 2: To view the recording and download it, click ‘Open’ You will be brought to the Zoom web interface.  Step 3: Click ‘Download’ to save a copy of the recording to your local machine.
  Step 4: Log into the COB media server (go to qsblc.ucd.ie)
  Step 5: Go to ‘Upload’
  Step 6: Add a title for the video, find the file and upload and select ‘Add Media’
  Step 7: To add the link to the module on Brightspace, select the LTI link to the video.
  Step 8: Navigate to the module on Brightspace and select the area on the module that you want to add the video to. Select ‘Existing Activities’ and then ‘External Learning Tools’
  Step 9: Select ‘Create new LTI link’
  Step 10: Add the title, the LTI link and then click ‘Create and Insert’.
  The link will appear in the module.
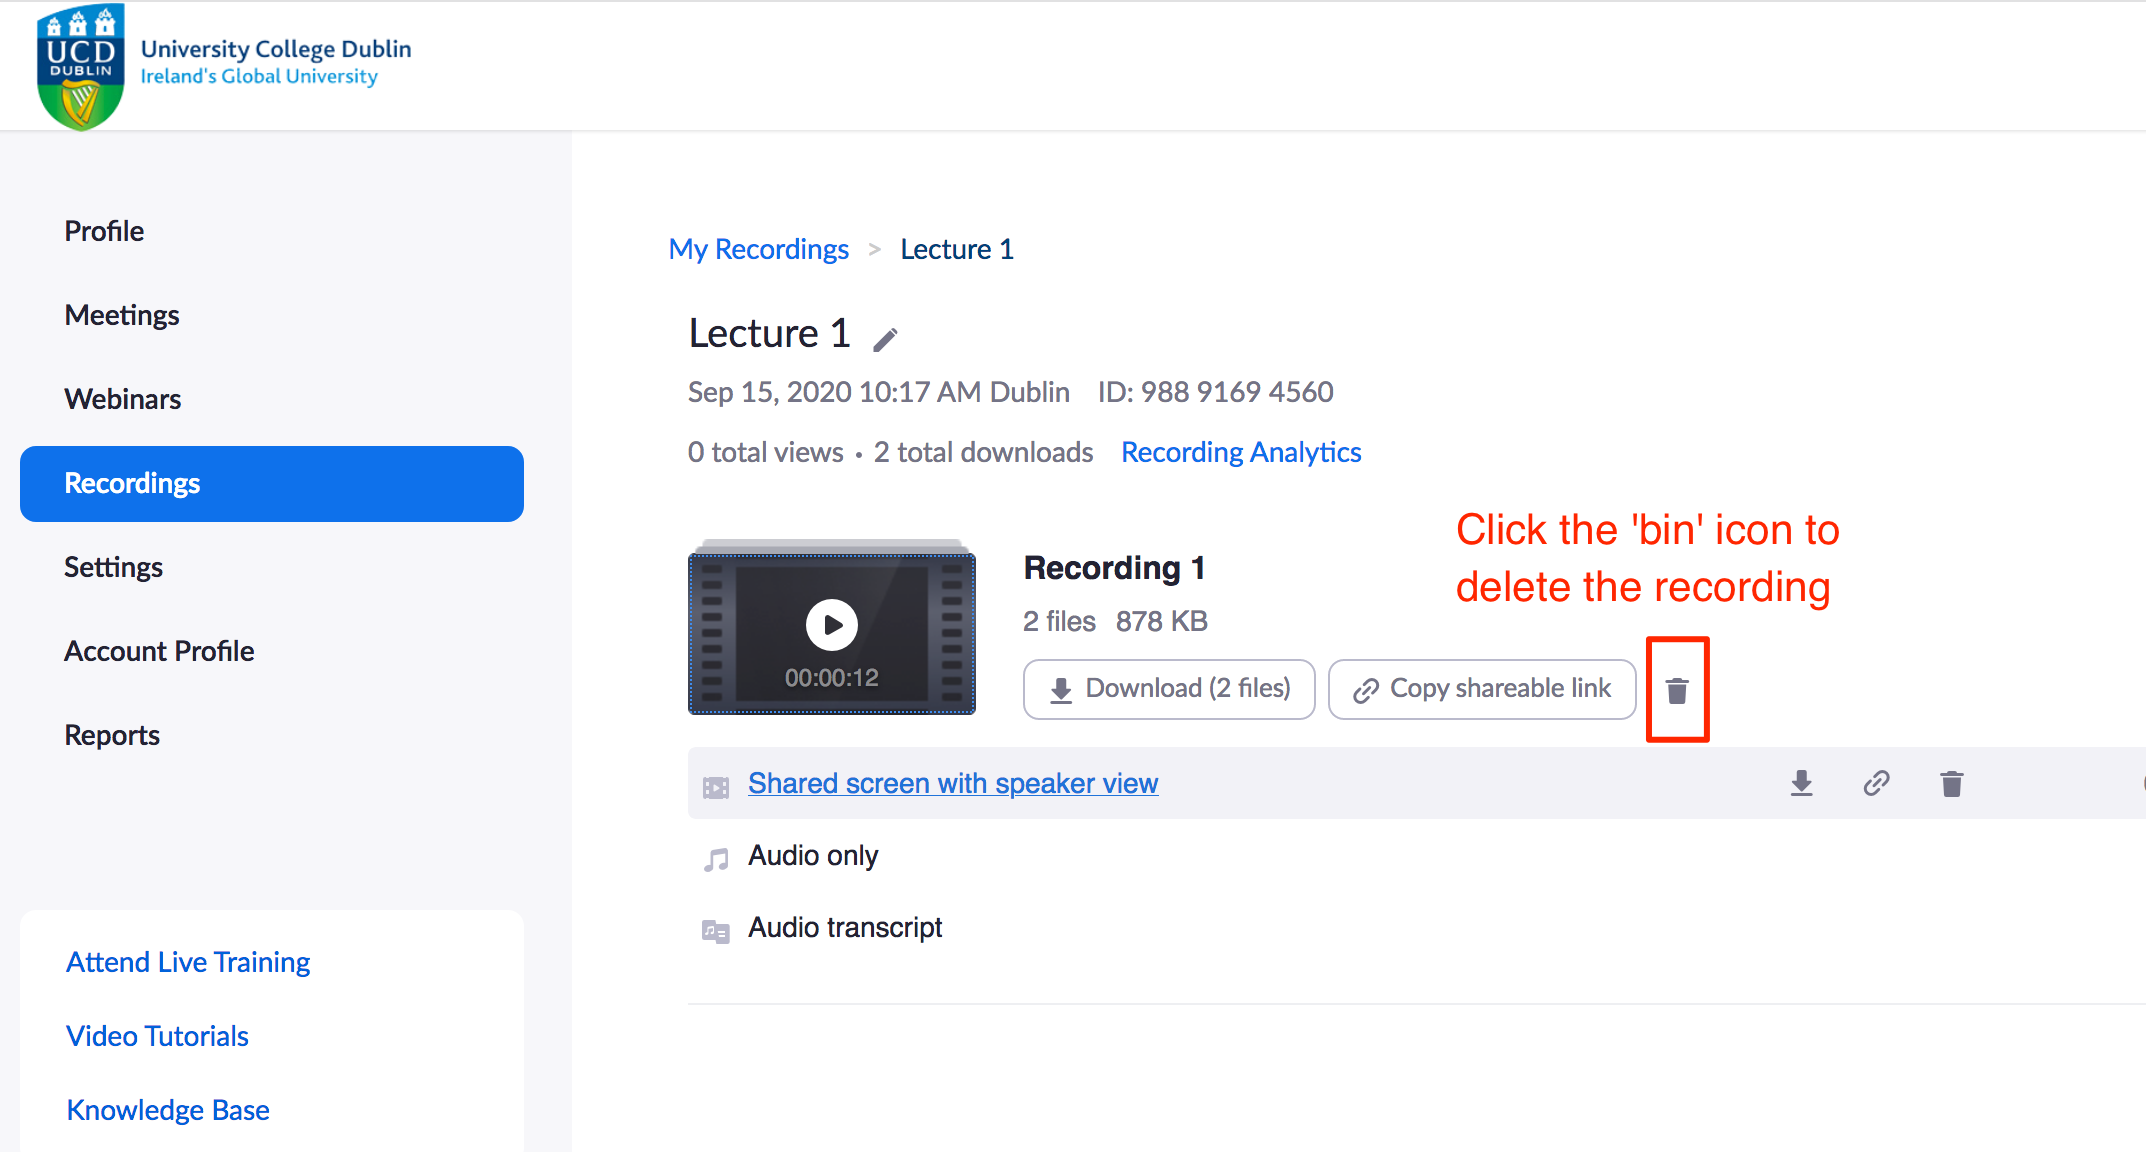
  Step 11: Once you are happy that the link is in the module, be sure to delete the recording from your Zoom cloud account. Go back to your Zoom account and go to the recording. Click the ‘bin’ icon to delete the recording and associated files.


