Studio Guide: Connecting to the Wireless Display

The majority of the studios in the Quinn building are enabled with wireless display technology. This means that you can share your laptop or device screen on the studio display without having to use a cabled connection. There are a number of steps you must complete before you can use the wireless display technology. Some of these steps will only need to be completed once. The following guide shows the steps needed for laptops running MacOSX to connect to the wireless display. You can also view these steps in the PDF document (right).
Connecting to Eduroam
You must be connected to the eduroam network in order to use the wireless display. You install and configure eduroam client on your laptop or device before you connect to the network. You will only need to perform this action once.
Connecting to Eduroam
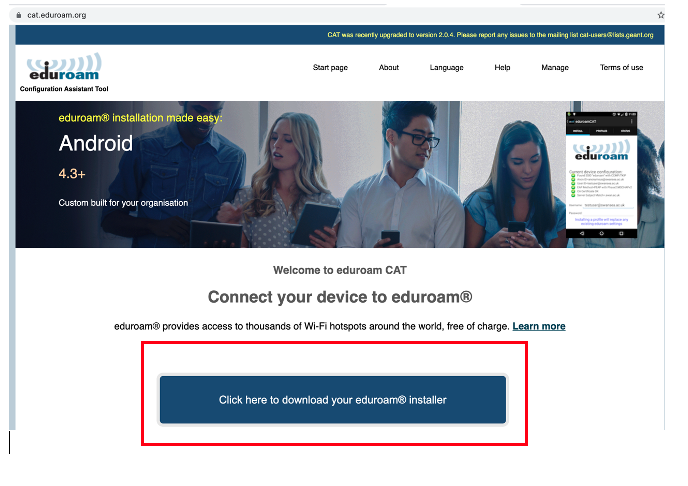
- Go to the eduroam website (http://cat.eduroam.org) and click the button on screen that says ‘Click here to download your eduroam installer’.
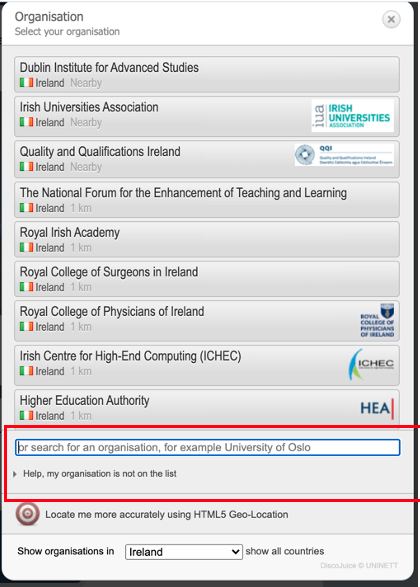
- Next, select UCD from the list of participating organisations. It may help to type the name ‘University College Dublin’ into the search bar to find UCD quickly.
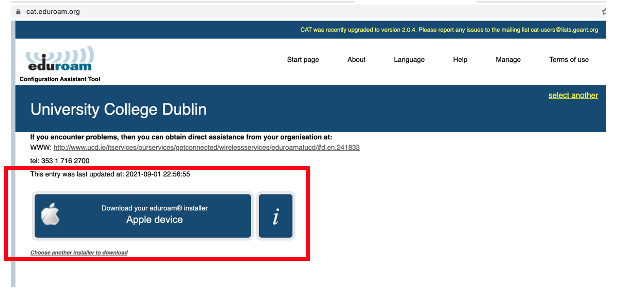
- The relevant client for your device will appear. Click to install it.
- Depending on your browser settings, you may be prompted with a warning regarding the download. You can click to ‘Keep’ the eduroam installer.

- Double click the download file when it becomes available.

- You will be prompted to accept the eduroam profile installation in your system preferences.

- To do this, go to System Preferences.
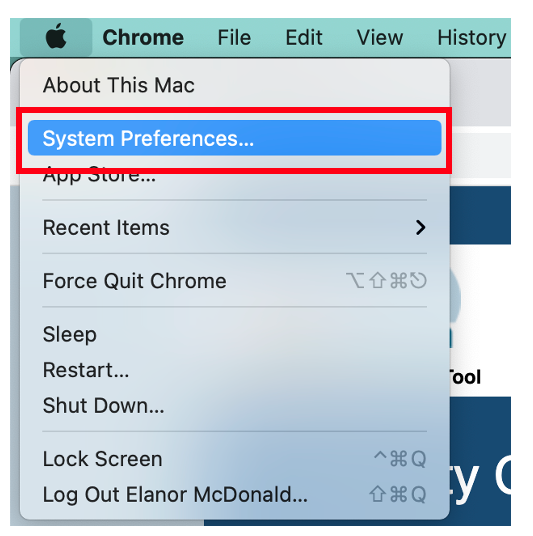
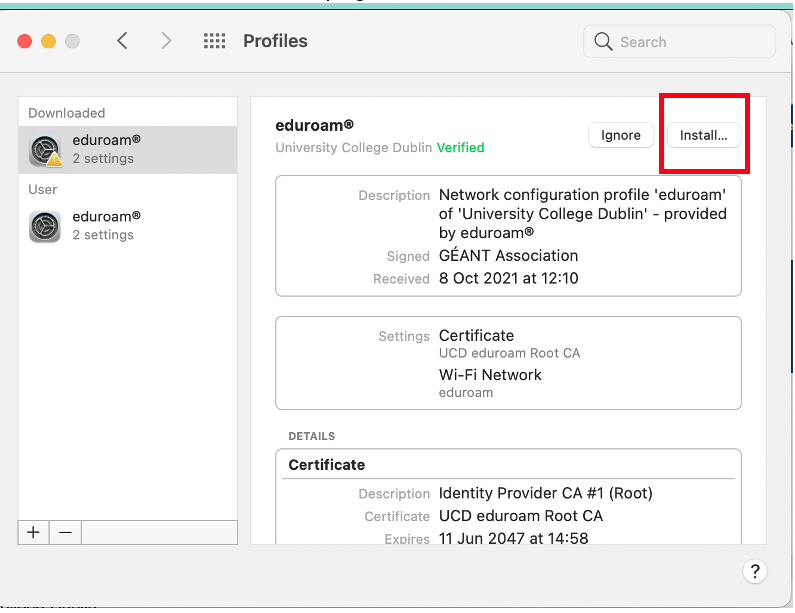
- Then to Profiles.

- And then click Install at the top right of the screen.
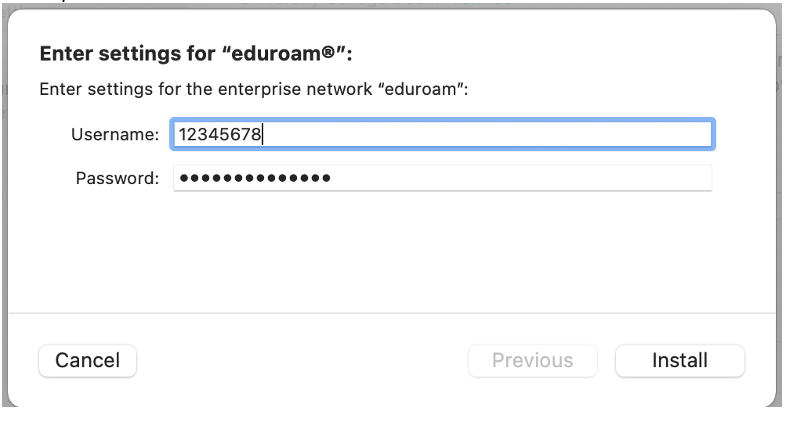
- You will be prompted to enter your UCD connect username and password at this point.
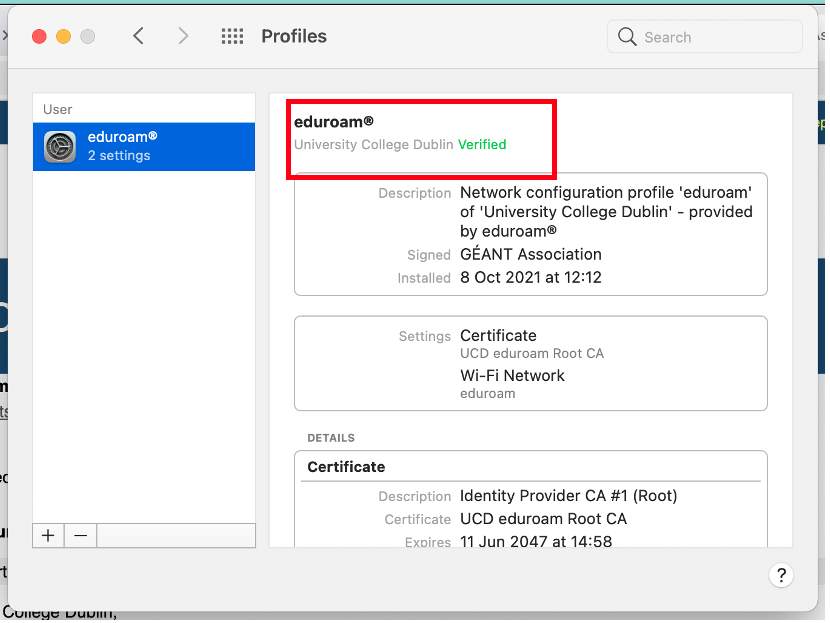
- A green confirmation message of Verified will display once installed.
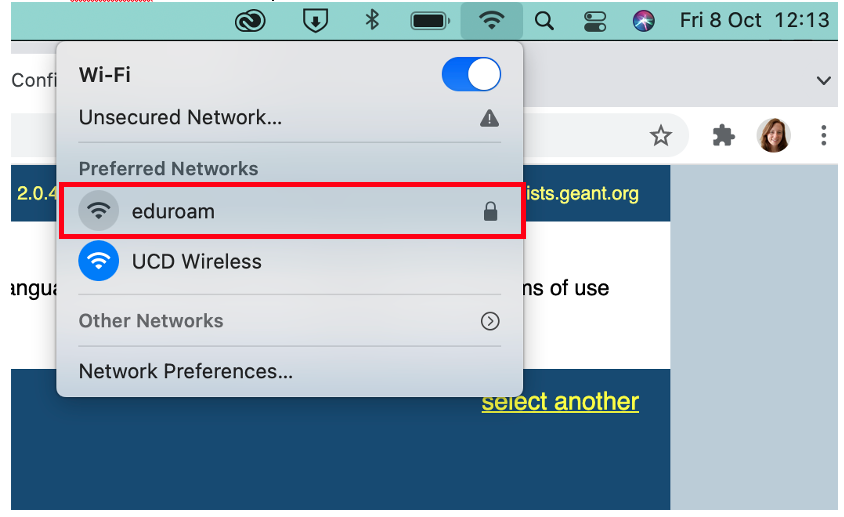
- Once installed, select eduroam from the list of available wireless networks on your machine. Go to the top right of your machine and click the WiFi symbol. Select eduroam from the drop down.
Download and install the Wireless display App
Once eduroam is installed on your machine, you will then need to download the wireless display app, which will let you share you content on screen.
Download and install the Wireless display App
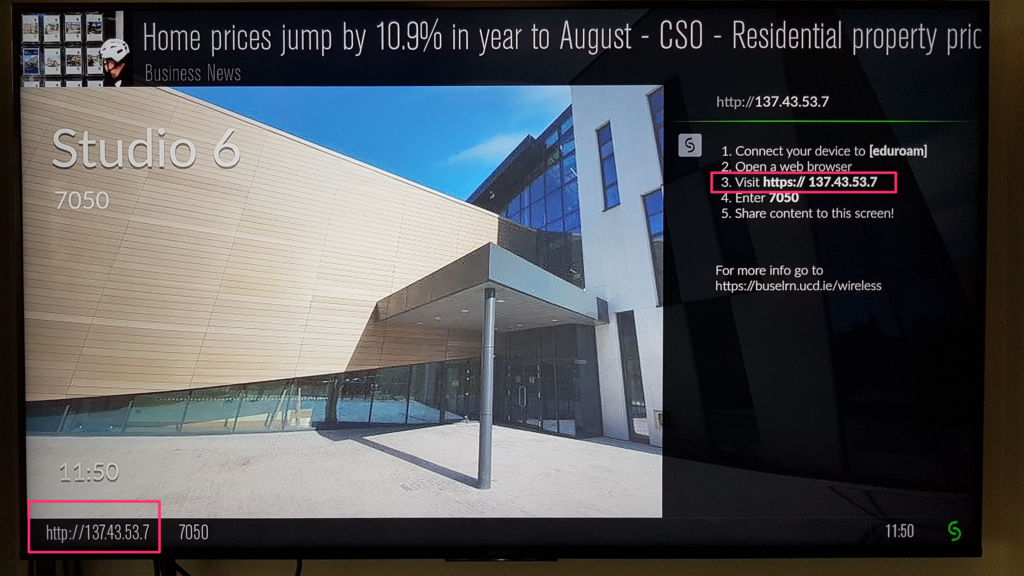
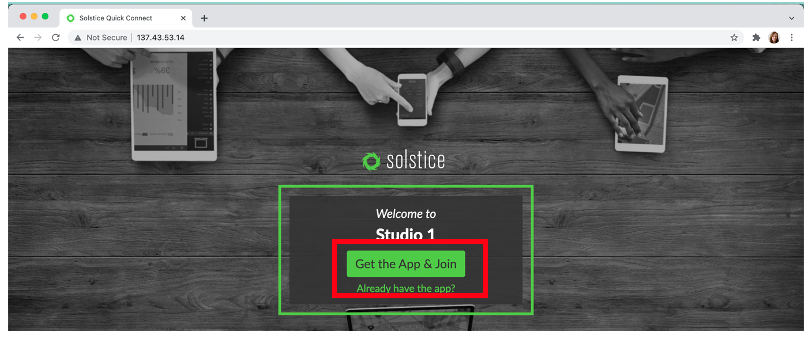
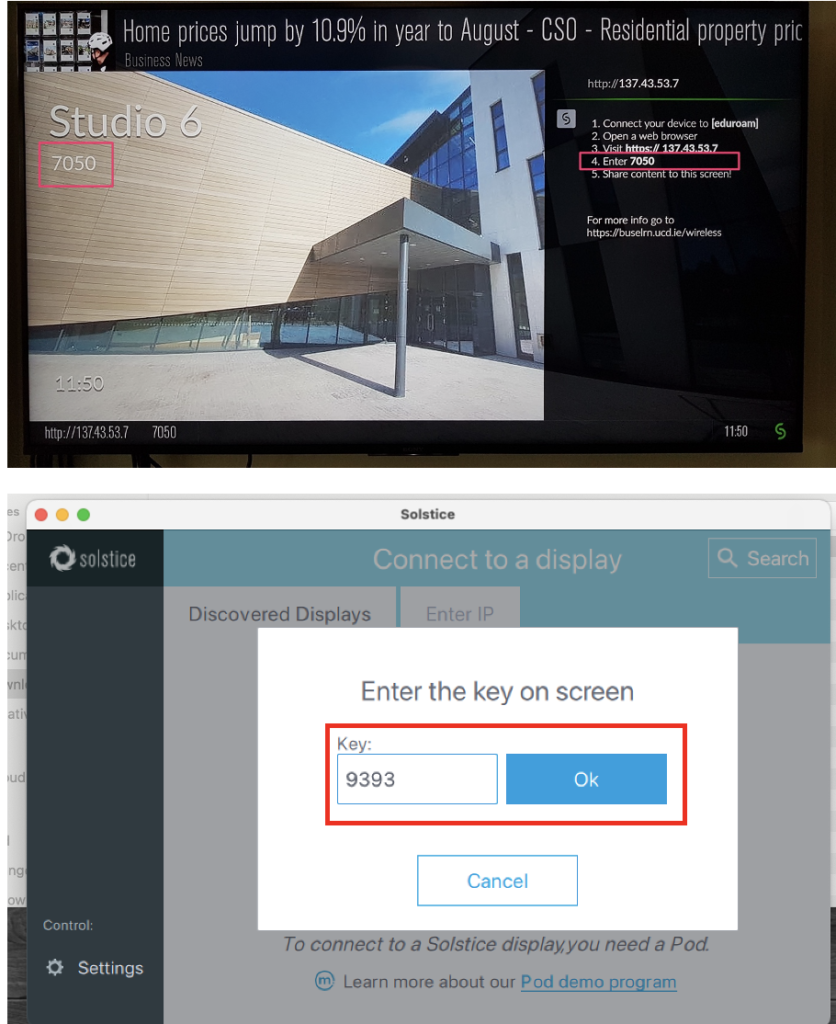
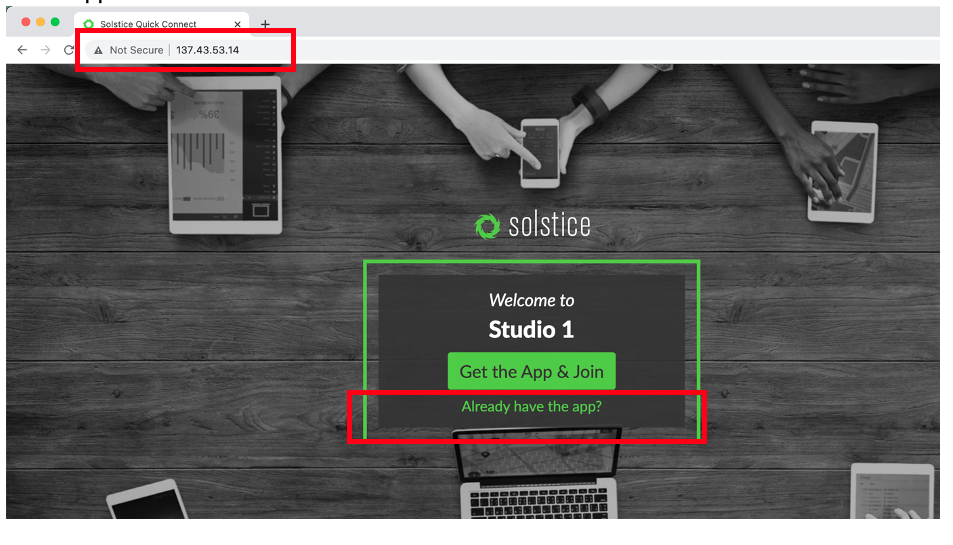
- Open an internet browser window and type in the IP address of the wireless display in the studio you have selected to use. The IP address will be available on the studio display.
- You will be prompted to download the wireless app on the next screen.
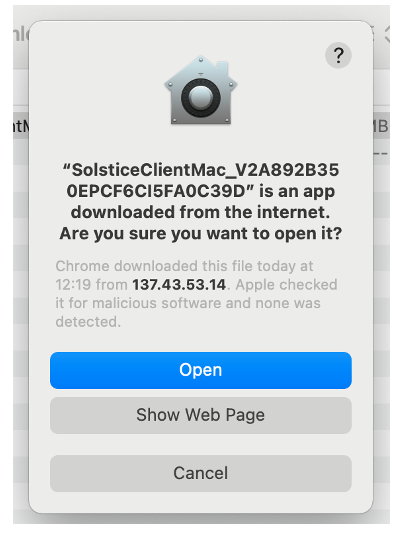
- When the app downloads, navigate to the downloads folder and double-click to run the installation.
- Step through the installation process
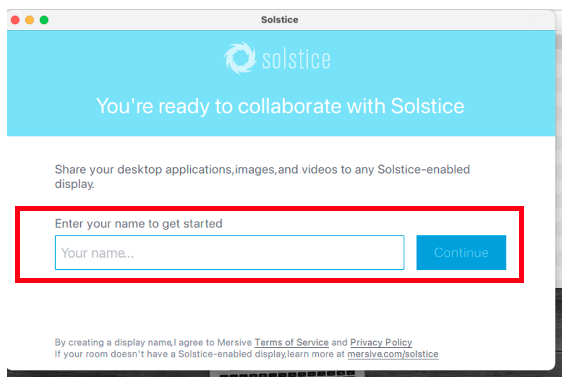
- You will be prompted to join the wireless display once the app is downloaded and installed properly. First, enter your name in the pop up.
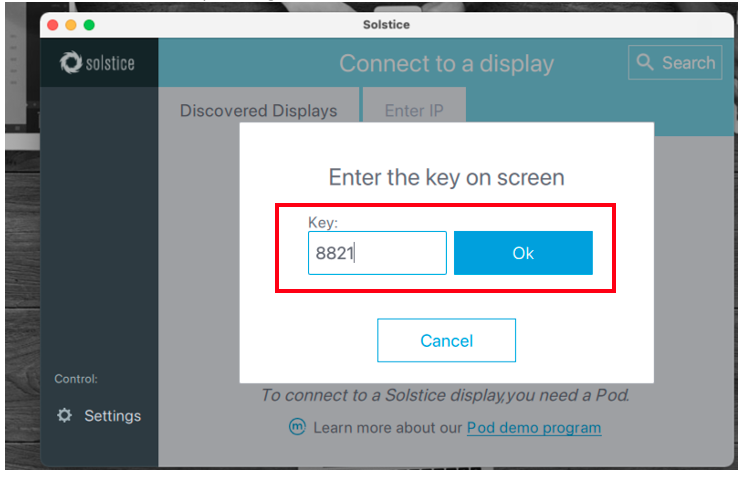
- And then, enter the room key, that can be found on the studio display screen.
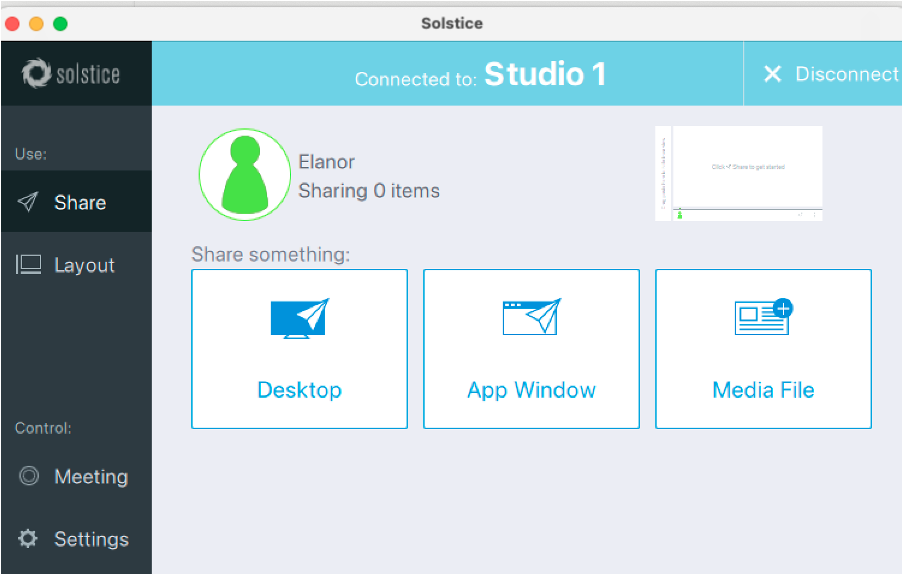
- You will enter the wireless display share screen.
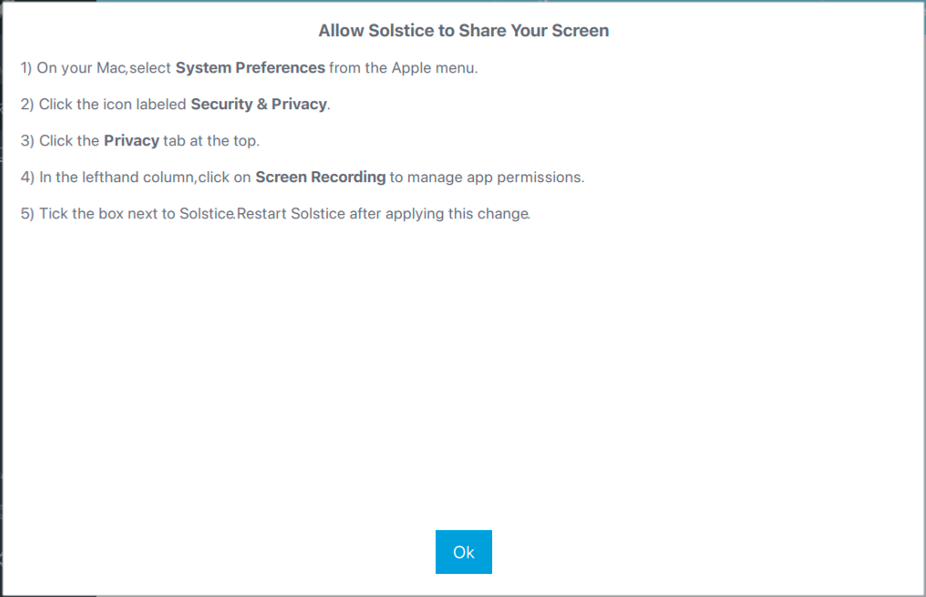
- You may need to allow the app access to share your screen. You will be prompted with this message, if that is the case.
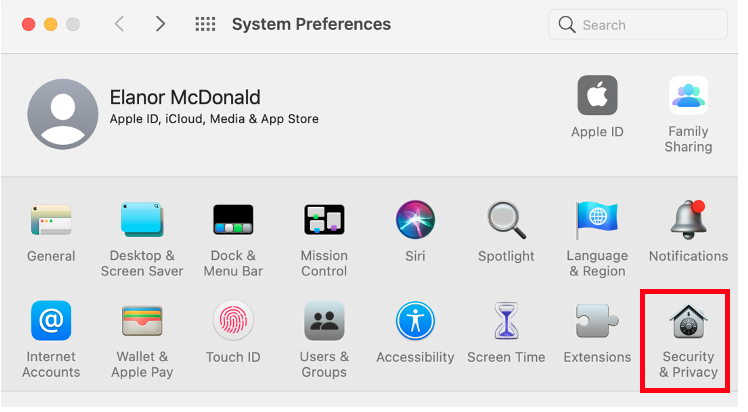
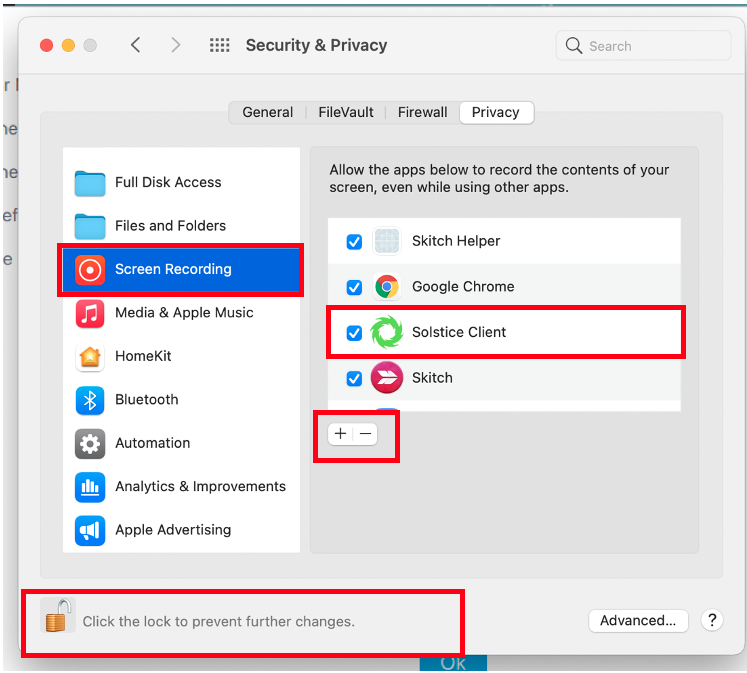
- In order to enable the screen share close the wireless app, then go to System Preferences, and select Security and Privacy.
- Ensure that Solstice Client has access to Screen Recording. If Solstice client doesn’t automatically appear on the list, then click the + button to add it. You may need to Unlock changes to allow the changes to be made.
- Open your browser window again, and type in the IP address. Select Already have the app.
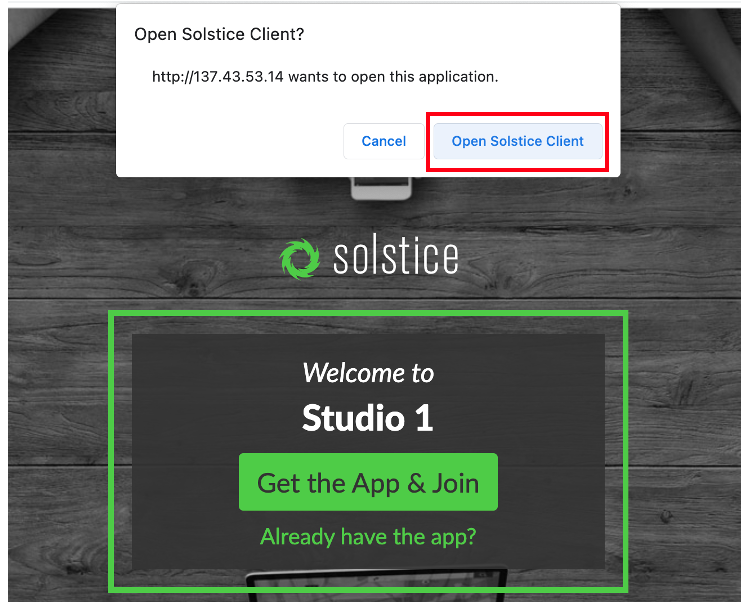
- Click Open Solstice Client, when prompted.
- Enter the room key once again.
- And select what sharing option you want.
- To finish sharing, click Stop Sharing.
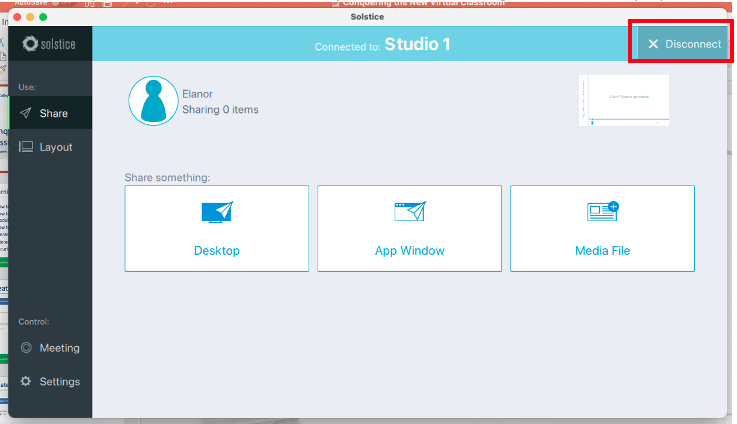
- Always be sure to Disconnect when you are finished using the wireless display.


