Quinn Studios 7 & 10 Presentation Recording Rooms
Quinn Studios 7 & 10 provide technology that enable students to record (onto USB) themselves while presenting a given topic. The use of the studio is restricted to academic and research purposes only.
Selecting the Camera
Selecting the Camera
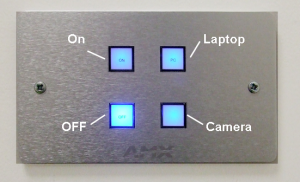
- To turn on the TV unit, go to the wall mounted panel located at the side of the TV.
- Select CAMERA on the panel so your laptop will be displayed from the podium.
- Your recording will be saved to a USB stick/drive, so you must bring one with you.
- Connect your laptop at the presentation podium and your USB key to the cables clearly labelled.
Recording
Recording
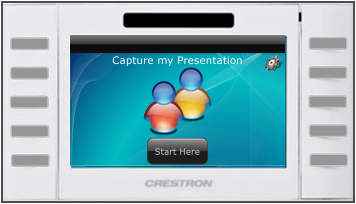
- On the Crestron Capture touchscreen, press Start here to launch the Program.
- To begin recording, press Start Recording.
- The “Preparing to Record” screen will appear and recording will commence shortly after.
- Recording will begin when the lights on the touch panel go RED and the Status screen will be displayed.

Saving your Recording
Saving your Recording
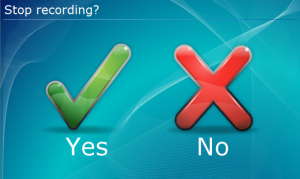
- When finished recording, press Stop Recording.
- This will display the “Stop recording?” Screen and recording will temporally be paused while this screen is displayed.
- You can then select “Yes” to stop recording or “No” to continue recording.
When the recording ends the Initial screen will re-appear. Please note: Don’t remove your USB until the red lights turn off
UROOMS – Studio Booking System
UROOMS – Studio Booking System
As you are aware students must pre-book the studios in the Collaborative Workspace Q106 for group-work activities. The room booking system has now changed to URooms. Follow this procedure to book a studio: Step 1 – Login to InfoHub, select the Campus menu and choose Book a Studio Room in Quinn College of Business. Step 2 – Now enter the Date, Start time and Duration for which you wish to book the room. Fig 1: URooms search tool Step 3 – Once you have searched and you can select the studio and click Book. Step 4 – You should then read the terms and conditions and select the purpose for your booking. Step 5 – You will receive an email to confirm your booking. Note: as per the previous system, bookings can be cancelled if the rooms are required for college bookings.
Wireless screen sharing with your Laptop or mobile device
Wireless screen sharing with your Laptop or mobile device
- In order to use the wireless projection function in Studio 7 or 10, you first need to connect to the eduroam network.
- For details on connecting a Window 10 laptop, click here
- For details on connecting an apple laptop (macbook), click here
- For details on connecting an iOS device (ipad), click here
- For details on connecting an Android Smartphone (Samsung Galaxy A3) click here
Connecting using your Laptop
Connecting using your Laptop
- You will need to select button ‘A’ from the wall panel,
- If you don’t see the Coalesce Blackbox welcome screen, wait for about 5 seconds and press button ‘A’ again
- Ensure your laptop or device is connected to the eduroam Wi-Fi network
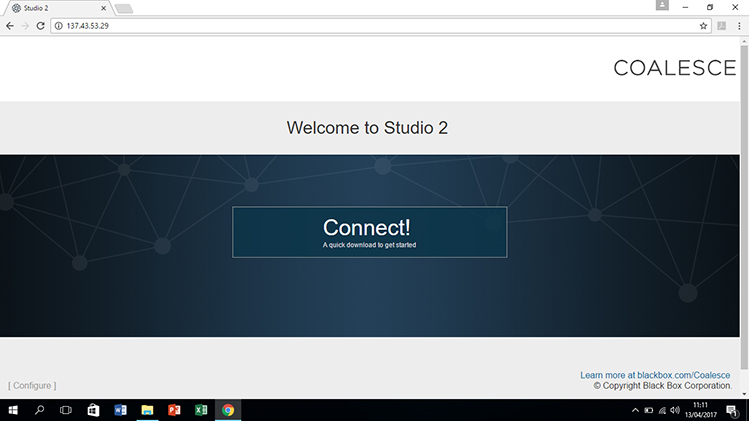
- If you are using your laptop, type the URL that you see on screen into your browser address bar
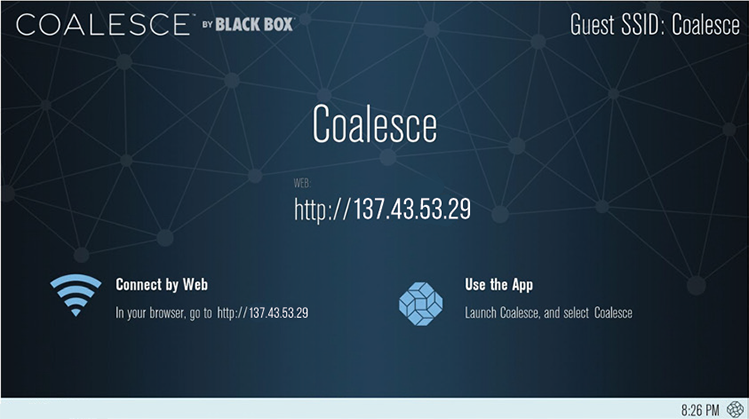
- Click Connect to download the Coalesce client
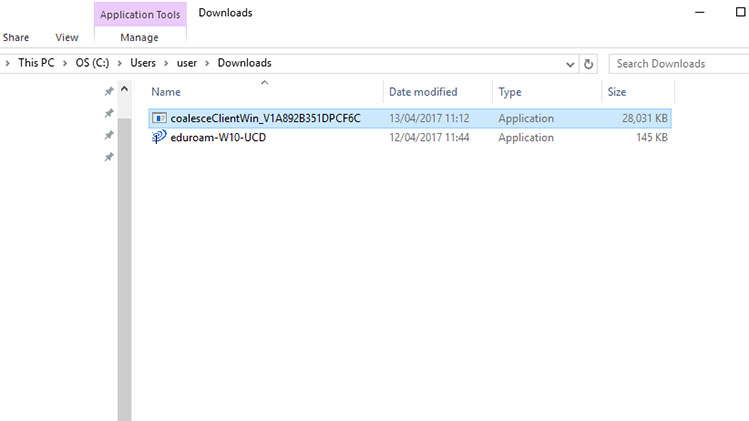
- The setup file will normally be saved in your Downloads folder, locate and launch the file
- You will only need to do this step once, the installation process will install a Coalesce icon on your desktop.
- In future, click the Coalesce desktop icon in any studio once installed
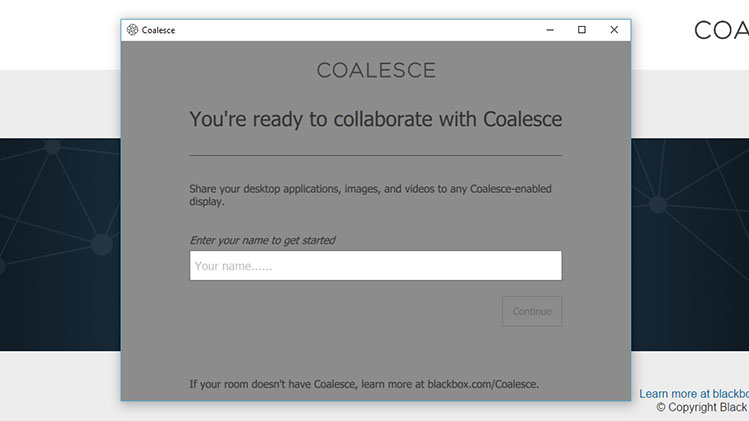
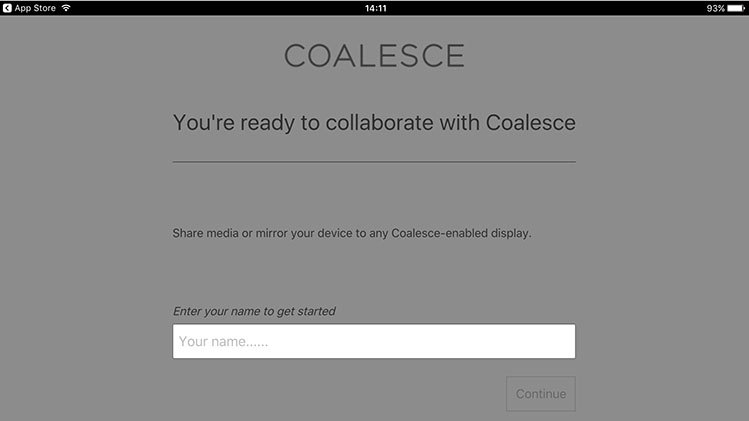
- Enter your name or a name for your device
- Click Continue
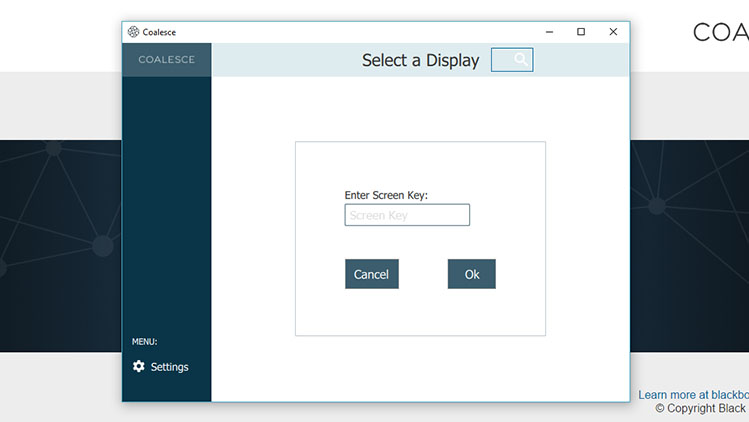
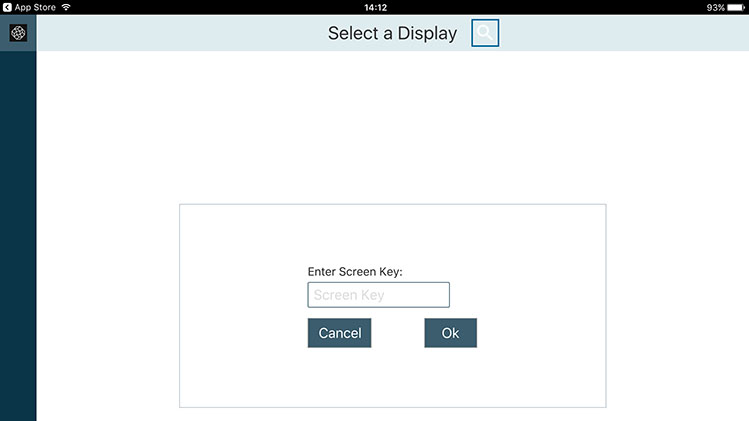
- Enter the Screen Key as displayed on the plasma screen
- The Screen Key is unique to your session and will automatically regenerate when you have disconnected
- Click OK
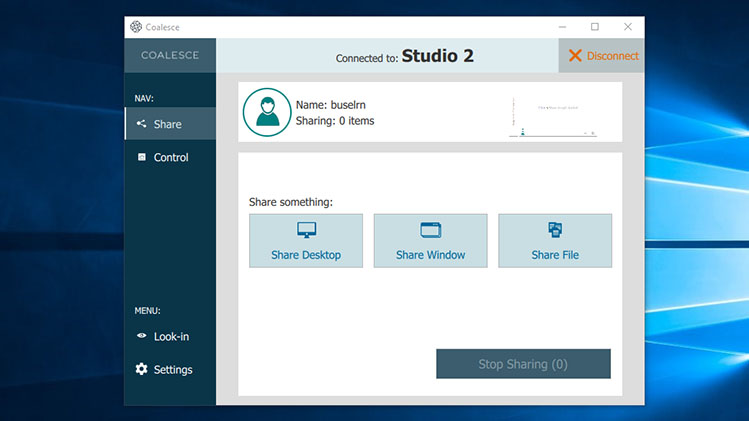
- Choose what you want to share!
- Click Share Desktop to display your device
- Click Share Window to display an application
- Click Share File to display a file such as an image
- Up to 4 devices can display simultaneously, the screen will resize dynamically
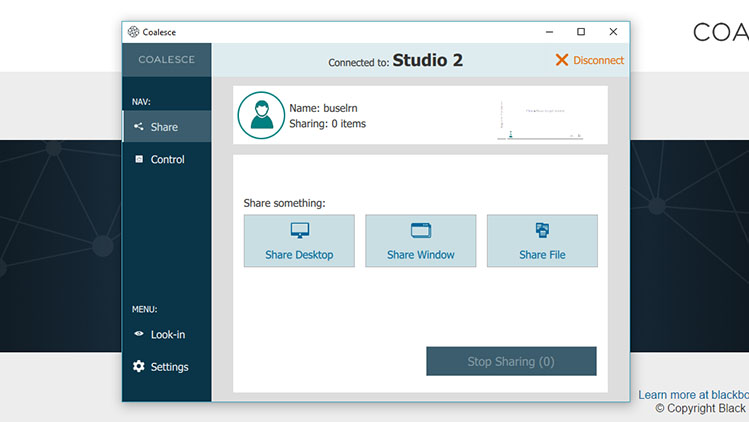
- To end the session simply click Stop Sharing and then Disconnect
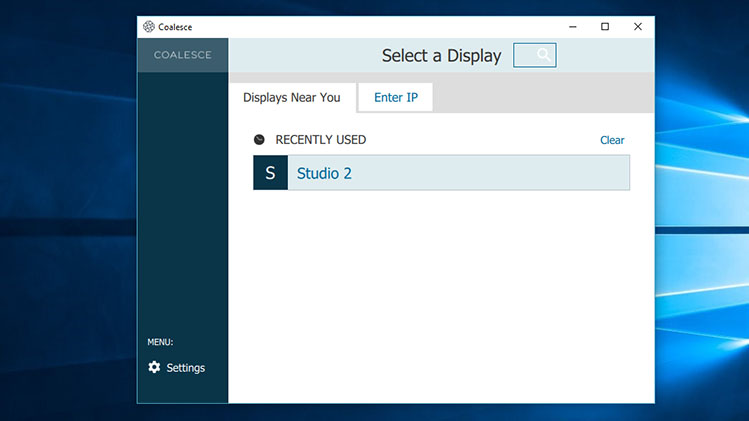
- When connecting in future, launch the coalesce app from the desktop and select recently configured Studios
- The application will remember visited Studios making it quick and easy to connect
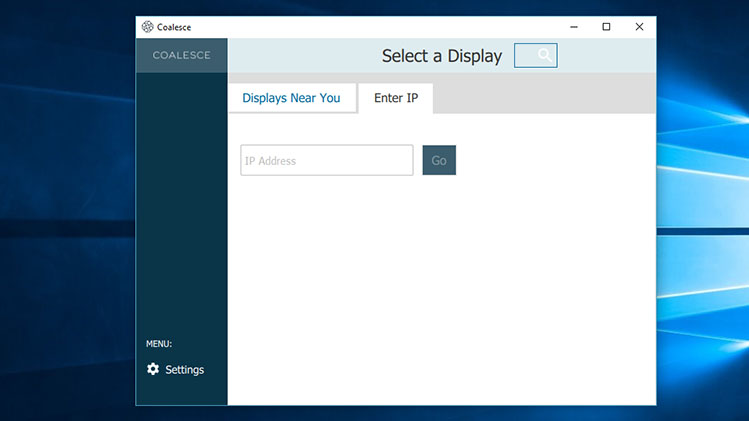
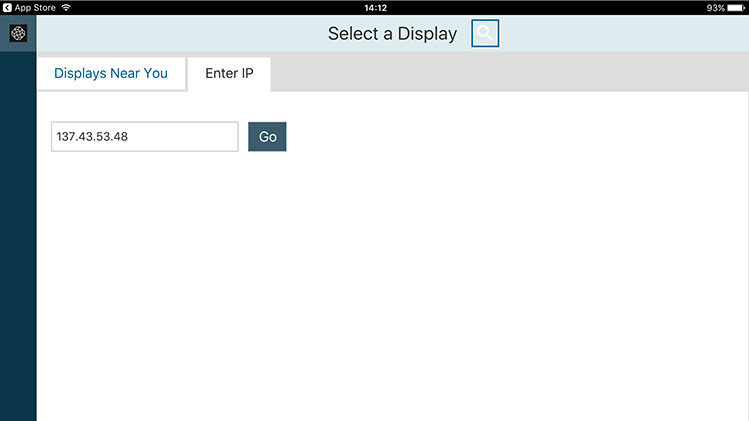
- To get started in a new Studio, simply launch the desktop Coalesce app, select the Enter IP tab and enter the IP address that you see displayed on the new Studio screen.
- The IP address is the numbers displayed on the welcome screen, in this example 137.43.53.29
- Click GO
Connecting Using a Mobile Device
Connecting Using a Mobile Device
- If you are using your mobile device, go to the App or Play store and search for Coalesce client
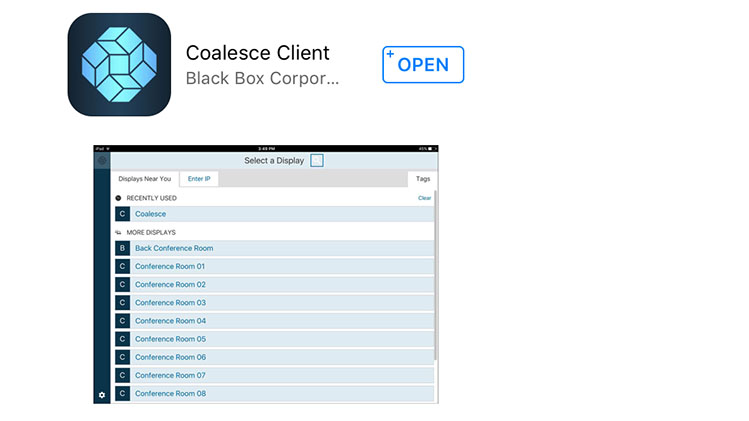
- Install and open the app & enter you name when prompted
- If it’s your first time to use the app enter the IP address for the room – you’ll see this on the plasma TV screen, it’s a number starting with 137.xx.xx.xx
- Enter the screen key as displayed on the plasma screen
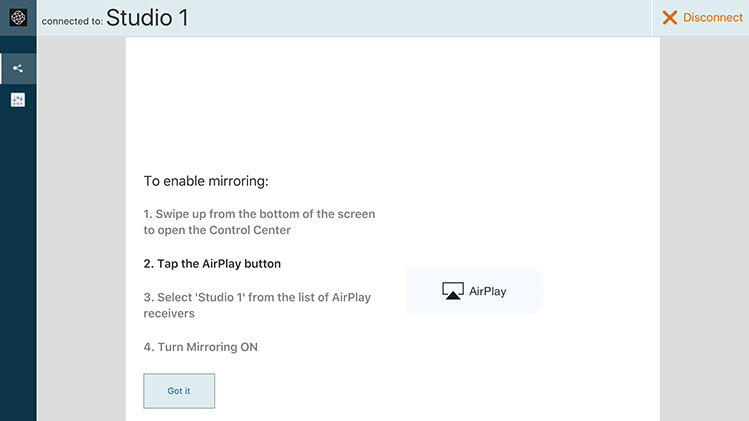
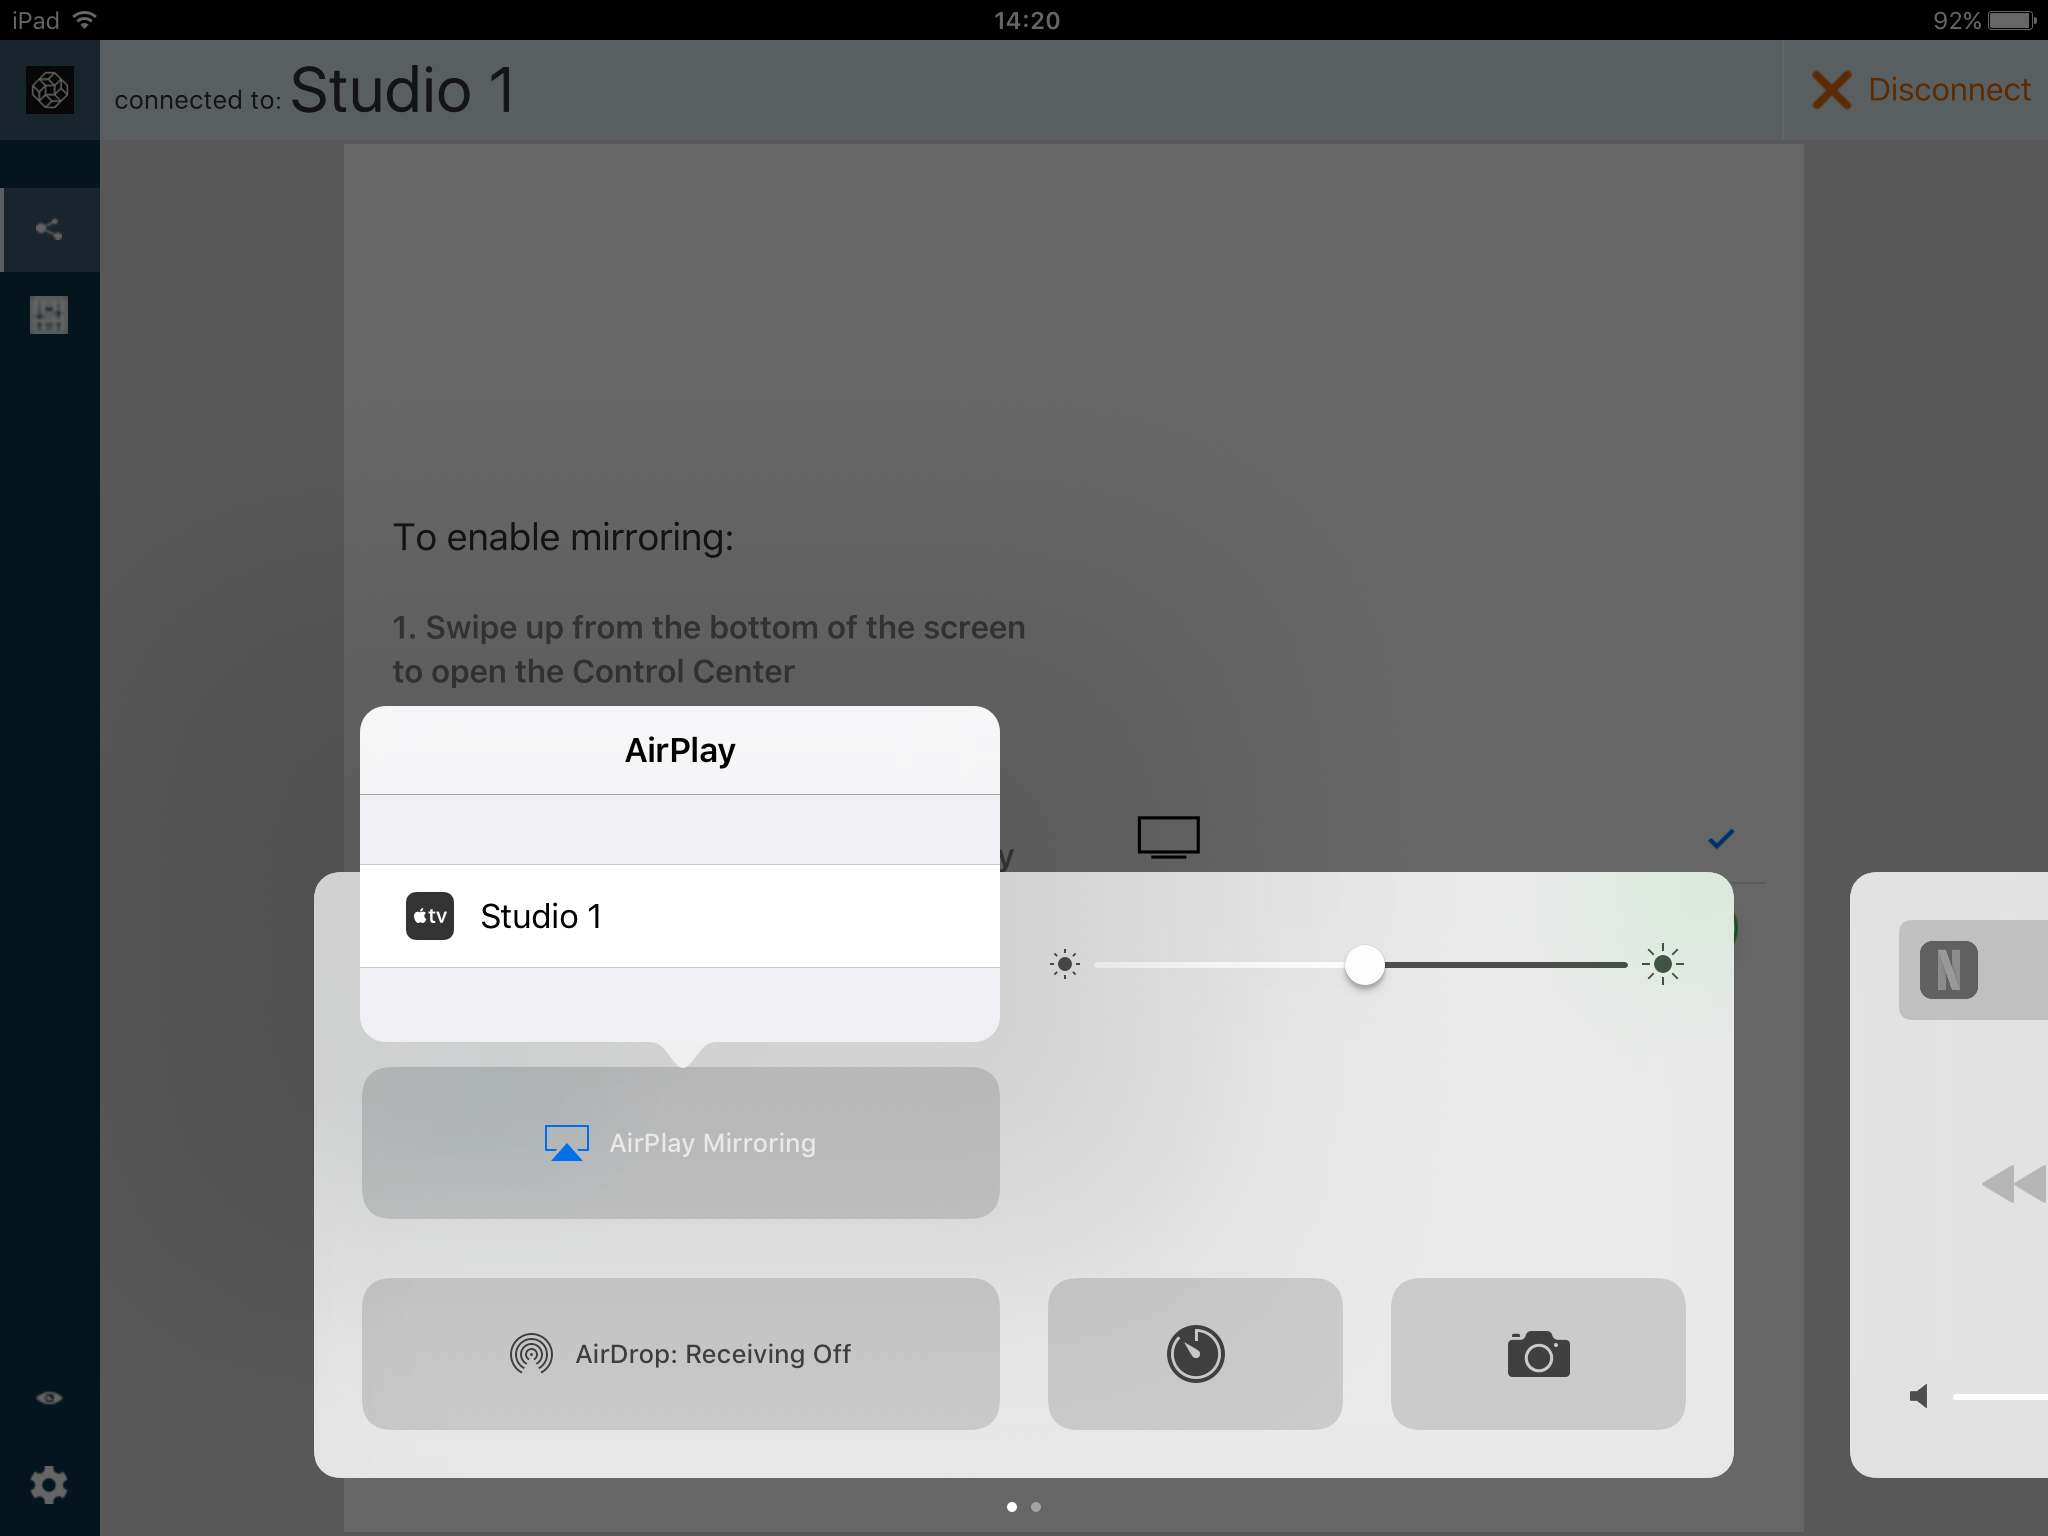
- For iOS users, enable Airplay and mirroring on your device